
In this article, we will configure the Clientless VPN on Palo Alto Next-Generation Firewall. Clientless VPN, as the name suggests, you do not need to install any client in the system. You just need to login into a web form. Once you authenticate, you can access several applications that are configured for you. So, let’s get started!
Scenario – Configure GlobalProtect Clientless VPN in Palo Alto
In this example, I’ve configured two security zones i.e. LAN and INTERNET. A test webserver is taken in the LAN zone. The LAN subnet is 192.168.1.0/24 and 192.168.1.1 is the gateway for the LAN users. The IP address of the Web server is 192.168.1.10. The domain name of the webserver is gns3network.com.

Steps to configure Clientless VPN in Palo Alto Firewall
To configure clientless VPN, you first need to configure Palo Alto GlobalProtect VPN, and after you need to configure Clientless VPN. If you already know to configure GlobalProtect VPN, you can skip 1 – 9 steps. Also, as in clientless VPN, Palo Alto firewalls act as a reverse proxy, so you might access only web applications/servers.
Step 1: Generating a Self Sign Certificate
To configure the GlobalProtect VPN, you must need a valid root CA certificate. So, you can generate your own certificate on Palo Alto firewall or you can use any certificate which is signed by any of the CA authority. To generate a self-sign certificate, Go to Device >> Certificate Management >> Certificates >> Device Certificates >> Generate. Now, just fill the Certificate filed as per the reference Image. Make sure you put your Common name should be the same as the interface IP on which you are configuring the GlobalProtect. In my example, it is 1.1.1.1.

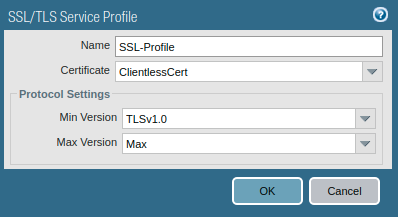
Step 2: Creating an SSL/TLS Service Profile
Now, you need to create an SSL/TLS profile that is used for portal configuration. So, Go to Device >> Certificate Management >> SSL/TLS Service Profile >> Add. Select the certificate you just created and the minimum and maximum version of TLS.
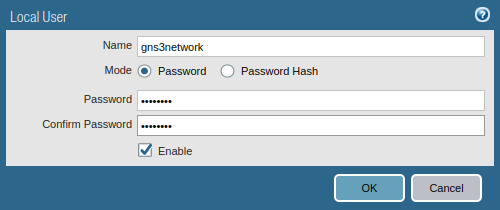
Step 3: Creating Local Users for GP Clientless VPN
GlobalProtect VPN needs to be authenticated during the VPN connection process. If you are running LDAP in your environment, you can integrate GlobalProtect VPN with your LDAP Server. For now, I’m creating a local user. Go to Device >> Local User Database >> Users and click on Add.
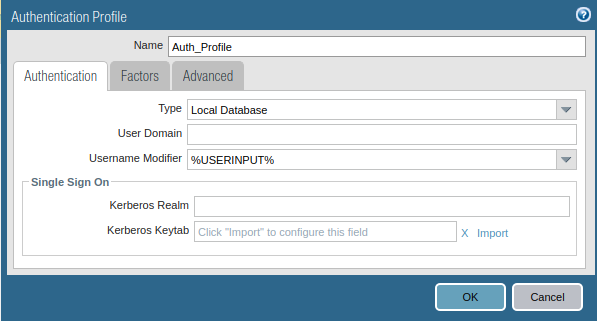
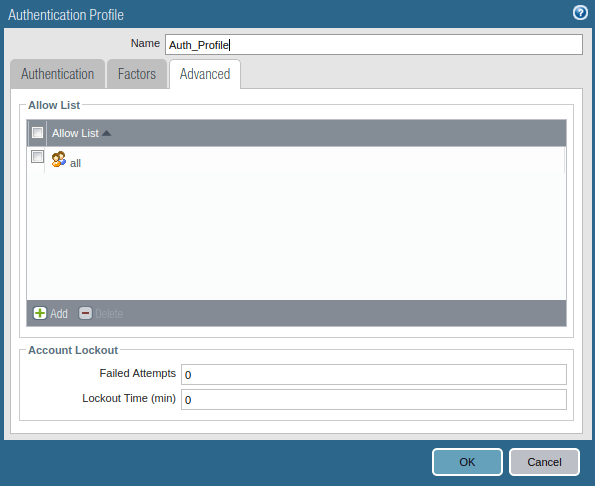
Step 4: Creating an Authentication Profile for Clientless VPN
Now, you need to create an authentication profile for Clientless VPN Users. Go to Device >> Authentication Profile and click on Add. Access the Advanced tab, and add users to Allow List. Just follow the steps and create a new Authentication profile.
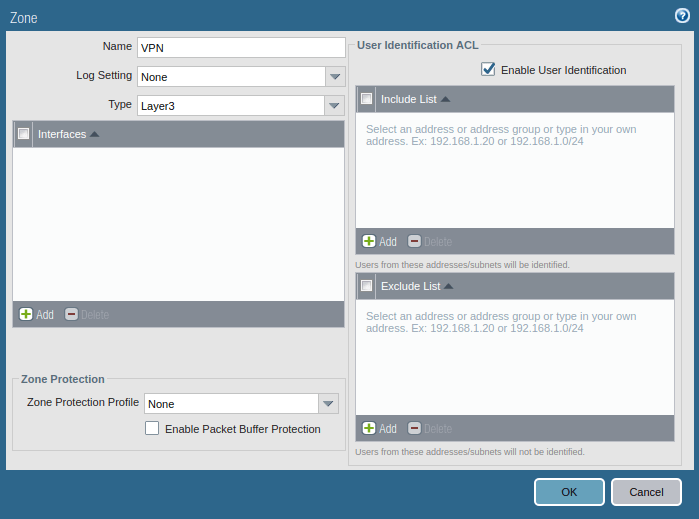
Step 5: Creating a zone for GlobalProtect
Like IPSec VPN, in GlobalProtect VPN, you need to create a zone for the tunnel interface. Although you can choose one of the pre-created zones, i.e. LAN, but it is always recommended to create a new zone so that you have granular control over the GlobalProtect traffic. To create Security Zone, go to Network >> Zones >> Add.
Make sure the Zone Type should be Layer 3 and Enable User Identification.
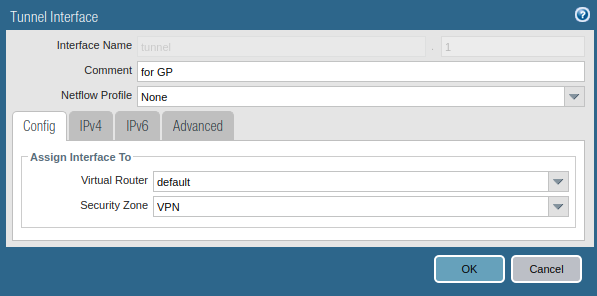
Step 6: Creating a tunnel interface for Clientless GlobalProtect
Likewise IPSec tunnel, you need to create a separate tunnel interface for the GlobalProtect VPN. Go to Network >> Interfaces >> Tunnel >> Add, to create a tunnel interface. Also, make sure you assign the same security zone which is created in the previous step. You can attach a management profile to the tunnel interface as per your requirement. Although, you do not need to assign an IP address to this interface.
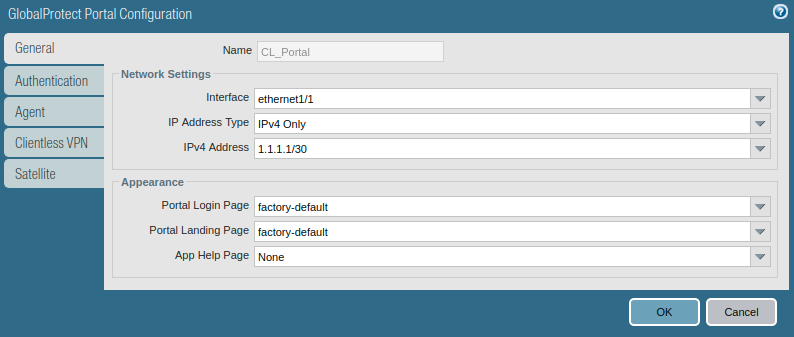
Step 7: Portal Configuration for GlobalProtect Clientless VPN
Now we will start configuring the actual configuration for GlobalProtect. Go to the GlobalProtect >> Portals >> Add. Access the General tab and Provide the name for GloablProtect Portal Configuration. Below this in Network Settings, select the interface on which you want to accept requests from the GlobalProtect client.
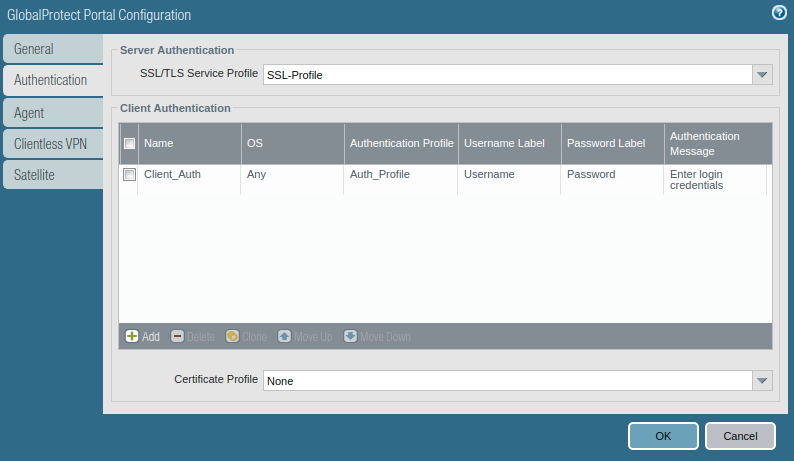
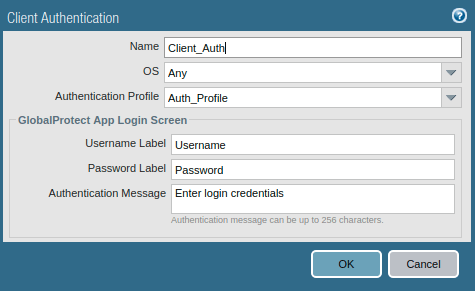
Access the Authentication Tab, and select the SSL/TLS service profile which you are created in Step 2. In Client Authentication, click on ADD. Here, you need to define a user-friendly name for Client Authentication and select the Operating Systems on which you want to run GlobalProtect. Also, select the Authentication Profile which was created in one of the previous steps.
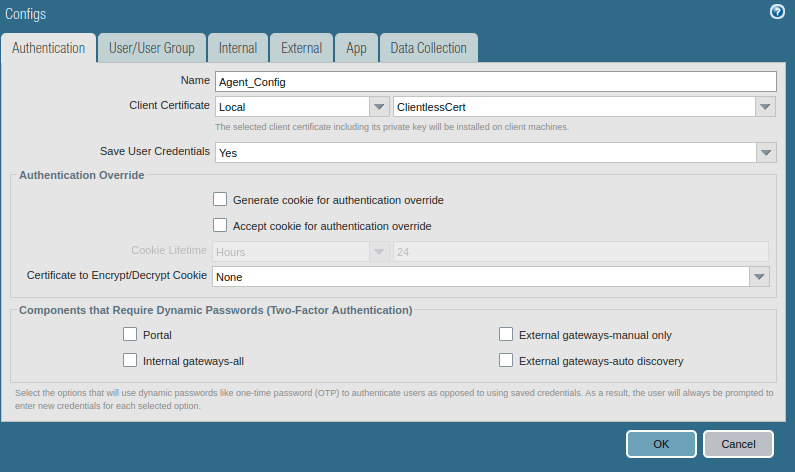
Now, access the Agent tab, and select the Trusted Root CA (created in Step 1), and check the option “Install in Local Root Certificate Store”. After this, click on Add Agent. Provide a user-friendly name for the agent.
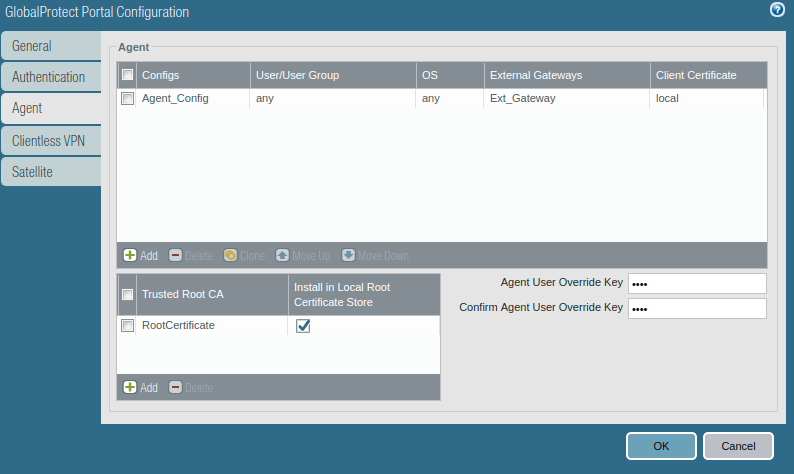
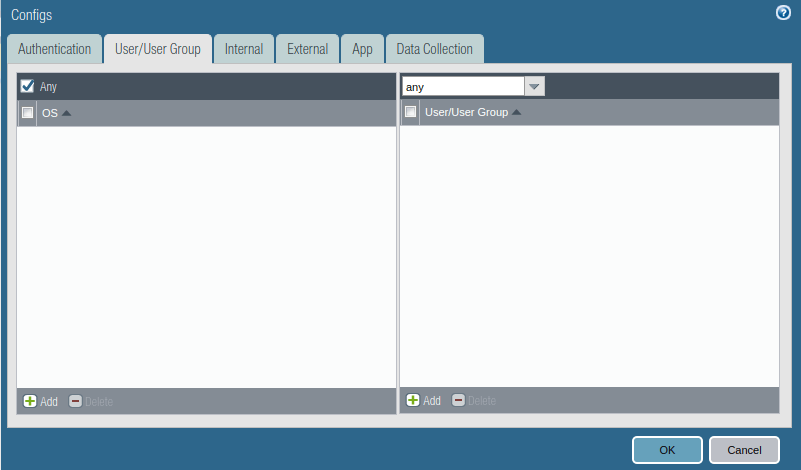
Access the User/User Group tab and select OS and User/User Group you have in your environment. In this example, I am using the ANY, ANY option.
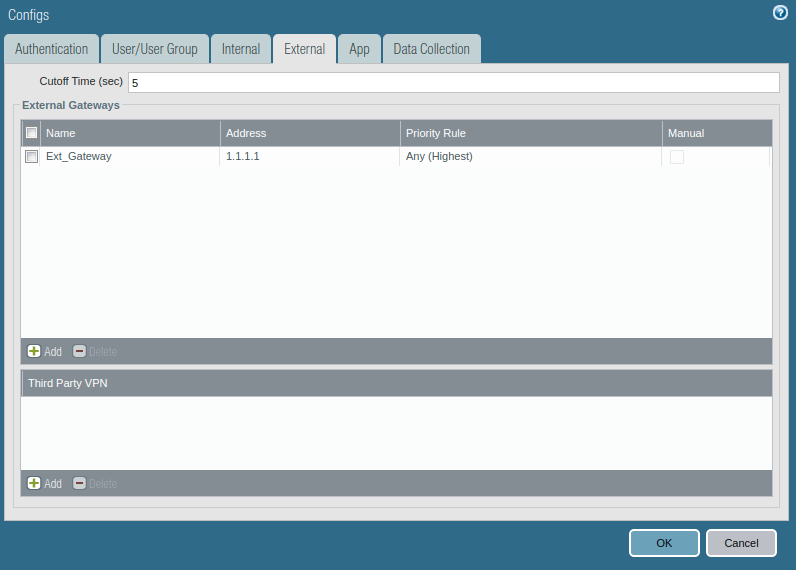
Access the External tab, and Add an External Gateway. Give the Name to External Gateway and provide IP, Source Region, and Priority details and click OK.
Note: This configuration needs to be done only if you need to configure GlobalProtect agent users.
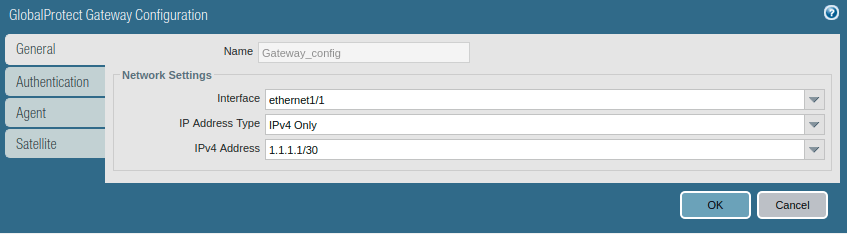
Step 8: Gateway Configuration for GlobalProtect
After the GlobalProtect portal configuration, we need to configure the Gateway Configuration for GlobalProtect VPN. Access the Network >> GlobalProtect >> Gateways and click on Add. Give the name to GP Gateway and In the Network Settings, define the interface on which you want to accept the requests from GlobalProtect.
Note: This configuration is not needed if you want to configure only Clientless VPN. However, if you are planning to configure both GlobalProtect Client and clientless VPN, then you need to configure it.
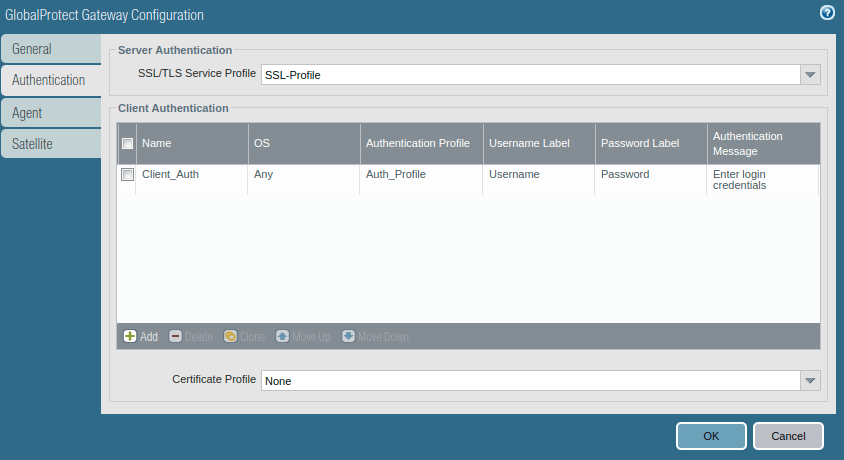
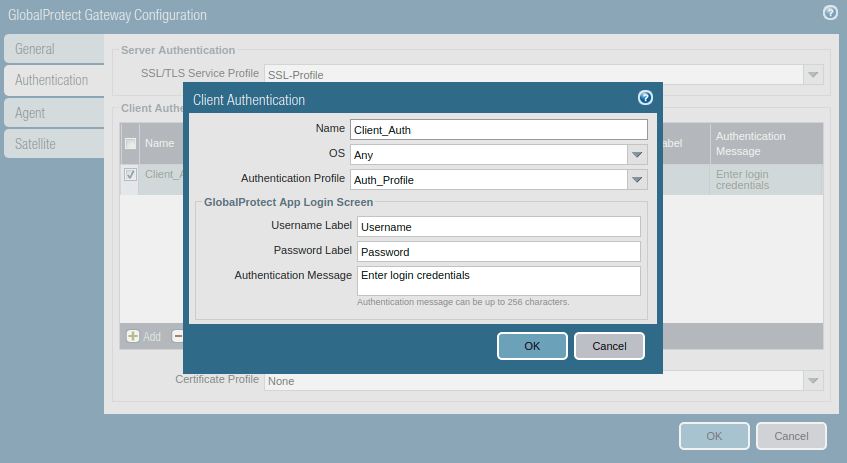
Access the Authentication tab, select the SSL/TLS service profile and click on Add to add a client authentication profile. Here, you need to select Name, OS, and Authentication profile.
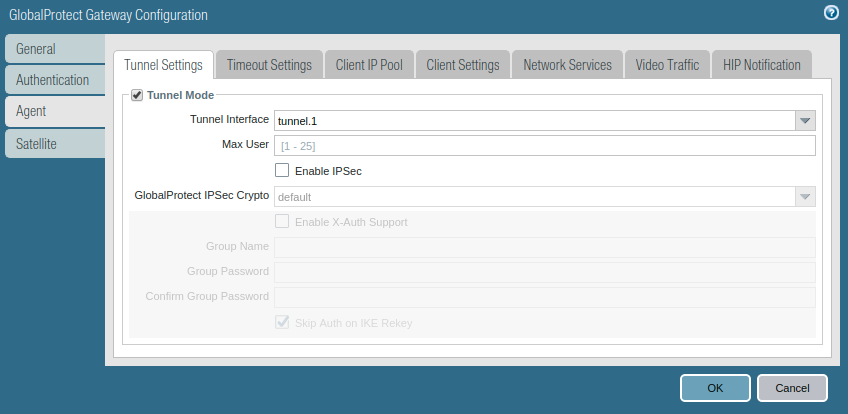
Access the Agent tab, and Enable the tunnel mode, and select the tunnel interface which was created in the earlier step.
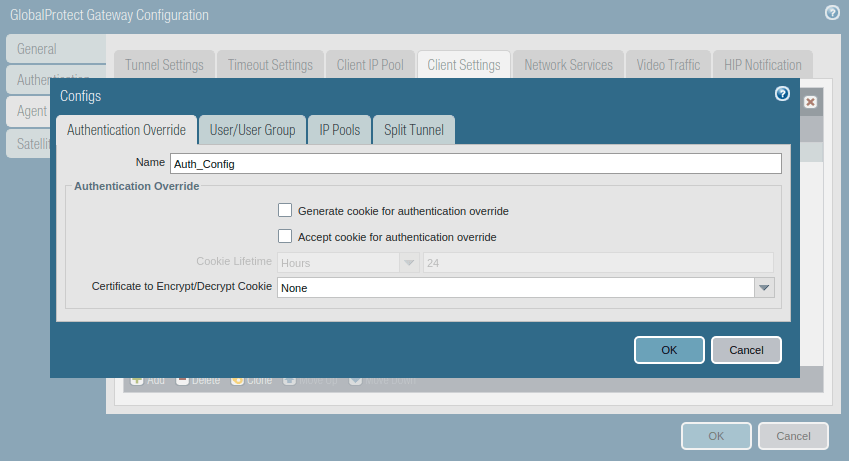
Access the Client Settings tab, and click on Add. Just, give a user-friendly name to this.
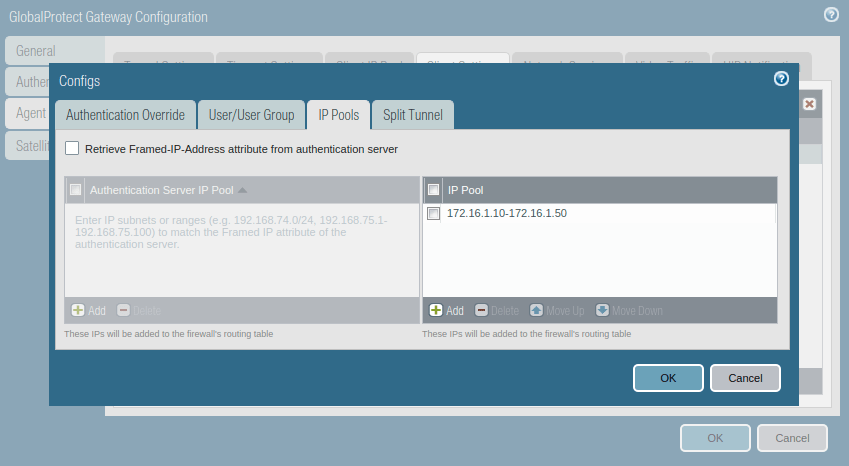
Now, access the IP Pools and assign an IP subnet or IP range which is used to assign the IP address once the client successfully authenticates the GP authentication.
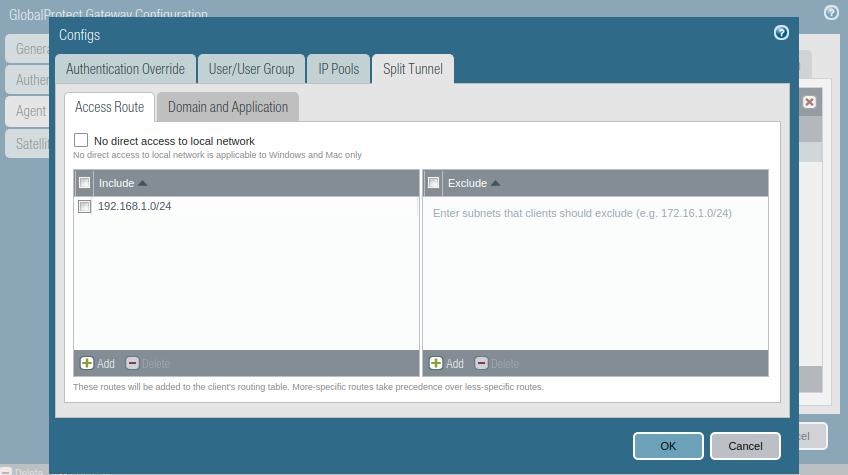
Access the Split Tunnel tab, and Include all networks you want to gives access to remote clients. For all routes, you need to provide a 0.0.0.0/0 network. For this example, I just configure my LAN network which is 10.10.10.0/24.
Step 9: Security policy for GlobalProtect
If you created a new zone for the GlobalProtect tunnel interface, then you must define the security policies to allow the traffic from the tunnel interface. Although, if you put the tunnel interface in Trust or Inside security zone, for example, you do not need to define the security policy for InteraZone traffic. To create a security policy, access the Policy >> Security and click on Add.
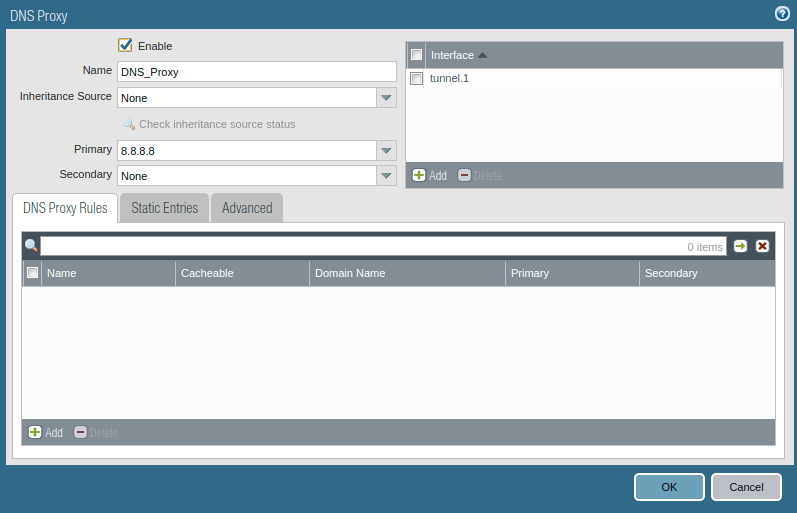
Step 10: Configuring DNS Proxy for Internal Web Applications
To configure Clientless GlobalProtect VPN, we need to configure DNS Proxy on Palo Alto Firewall. Here, DNS Proxy helps us to map domain names of web servers to IP addresses. So, users easily can access Internal resources using their domain name. To configure DNS Proxy, access Network >> DNS Proxy and click on Add. Make sure to click on the checkbox to enable the DNS Proxy. Define a user-friendly name to the DNS Proxy object. In the Primary DNS server, select your DNS Server. In the interfaces field, click on Add and select the tunnel interface you created for clientless GP VPN.
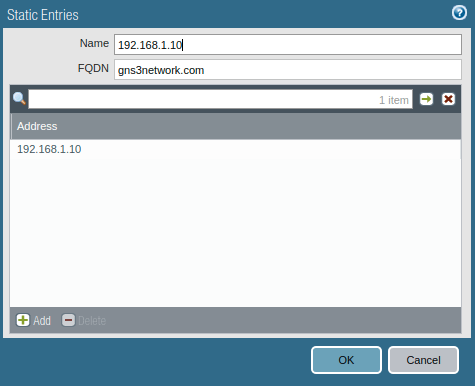
Now, access the Static Entry tab, and enter an ip-domain name mapping. In o example, I mapped the domain gns3network.com to 192.168.1.10.
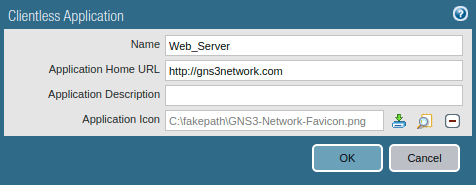
Step 11: Configuring the Applications for Clientless VPN in Palo Alto Firewall
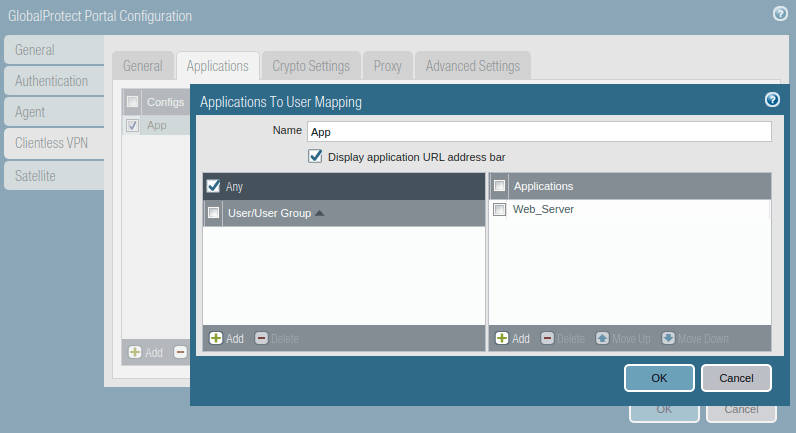
Now, we need to configure the applications on Palo Alto Firewall, so users can access them using Clientless VPN. Access the Network >> GlobalProtect >> Clientless Apps and click on Add. Define the app name and URL. In this example, I put the Application Home URL http://gns3network.com. You can also define the app URL as gns3network.com:80. You can also modify the icon of the clientless App.
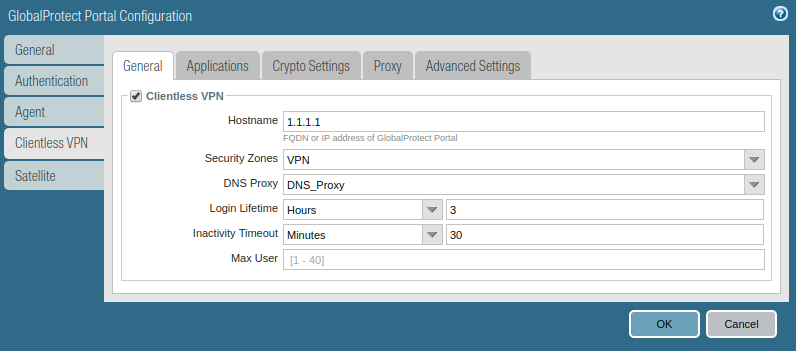
Step 12: Configuring the GlobalProtect Gateway to support Clientless VPN
This is the last step of our configuration. Here, you just need to define the Clientless VPN. Go to the Network >> GlobalProtect >> Portal >> and click on the portal you created in step 7. Access the Clientless VPN tab, access the General tab, and enable Clientless VPN. Select the Hostname, Security Zone, DNS Proxy, Login Lifetime, and Inactivity Timeout. The hostname is the GlobalProtect portal IP address and the security zone is the zone you created in one of the previous steps.
Now, access the Applications tab, and click on Add. Define the application you want to access from the clientless VPN. In this example, I’ve created a test webserver and mapped it in GP Portal.
Step 13: Verification of GlobalProtect Clientless VPN Configuration and Accessing webservers from GlobalProtect Portal
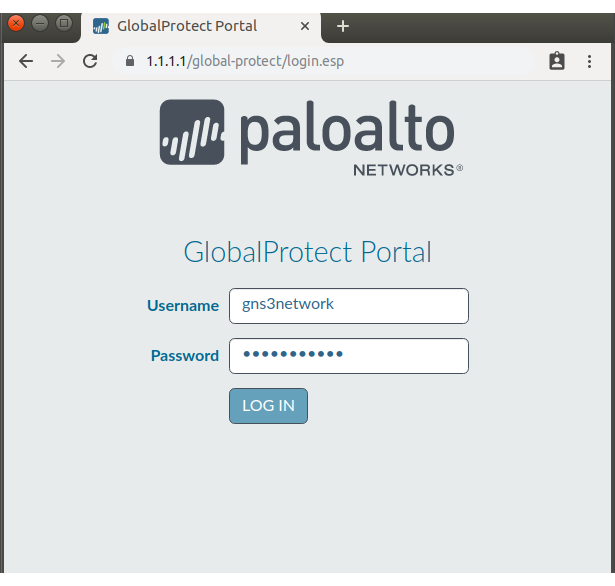
So far we have configured GlobalProtect VPN in Palo Alto Firewall. Now, we will test our configuration by accessing the GlobalProtect agent from a client machine. You can access the GlobalProtect portal by access the public IP of the firewall i.e. https://1.1.1.1 in my case.
Note: You have to install the self-signed certificate in the user’s machine, otherwise, a warning message will appear.
Open the GP Portal URL in Web Browser i.e. https://1.1.1.1 and Authenticate using Credentials
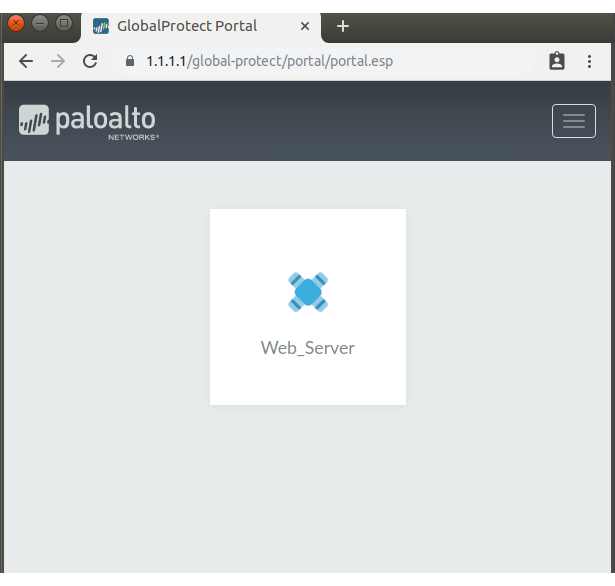
Palo Alto GlobalProtect Clientless Portal
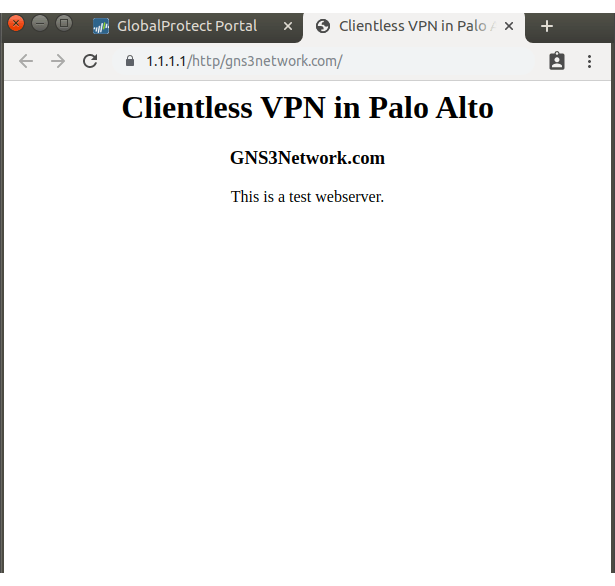
Web Server accessed using the Palo Alto Clientless VPN
Logs for Palo Alto Clientless VPN: Access the traffic logs, Go to the Monitor >> Traffic

Related Articles
- How to configure GlobalProtect VPN on Palo Alto Firewall
- How to configure the Captive Portal in Palo Alto Firewall
- UNAT in Palo Alto Firewall NG Firewall
Summary
In this article, we discuss how you can configure GlobalProtect Clientless VPN in the Palo Alto firewall. We configured the GlobalProtect VPN from basics to advanced steps. You need to define a certificate, GlobalProtect Portal and GlobalProtect Gateway. Also, you need to configure Applications for the GlobalProtect Clientless VPN. Additionally, it is required to create security policies to allow the traffic which is received from the GlobalProtect tunnel interface.
Did you found this article helpful? If you are facing any challange, please let me know in the comment box!
Hi ,
Why we need to create the tunnel interface, its ssl vpn
thanks
Hi, Actually I’ve covered the configuration for both Client and Clientlesss VPN then only I mentioned the tunnel interface. However, if you are planning for Clientless VPN only, then you didn’t need to configure the tunnel interface. Just create the Security Zone and put it in the Clientless Tab configuration.
Thanks admin , Nice tutorial
I appreciate your efforts , I am able to configure clientless VPN , Please make some tutorial on HIP profile as well .
Hi admin,
How to change clientless VPN portal to other port. For eg, I want user access to 1.1.1.1:1234 instead of just 1.1.1.1
Hi Mark, we can’t change the port of the Clientless VPN Portal. However, you can check with TAC, they might change the default port using root login on Palo Alto.
Hi there,
followed all steps,but when I try to connect to webportal,error message received:
GlobalProtect Gateway is not licensed. Contact system administrator.
Ans when commit in palo alto FW:
Warnings
Warning: GlobalProtect Gateway License is invalid. Clientless VPN feature is not enabled.
Any idea?
TIA,
MG
Hello MG,
Thanks for the comment. Clientless VPN requires an additional license, i.e., GlobalProtect Gateway. I believe I forgot to add this information in this article. I’ll update this article soon.