
In this article, We’ll configure GlobalProtect VPN in Palo Alto Firewall. If you are new to the Palo Alto Networks firewall, Don’t worry, we will cover all basic to advanced configuration of GlobalProtect VPN.
The public IP address on the Palo Alto firewall must be reachable from the client’s PC so that the client can connect to GlobalProtect VPN. However, they not need any static IP configuration. You can download GlobalProtect VPN from the Palo Alto support portal. Let’s start configuring the GlobalProtect VPN.
In case you want to configure CLientless VPN, you can follow the GlobalProtect Clientless VPN configuration guide.
You can directly jump to the Video Session at the end of the page.
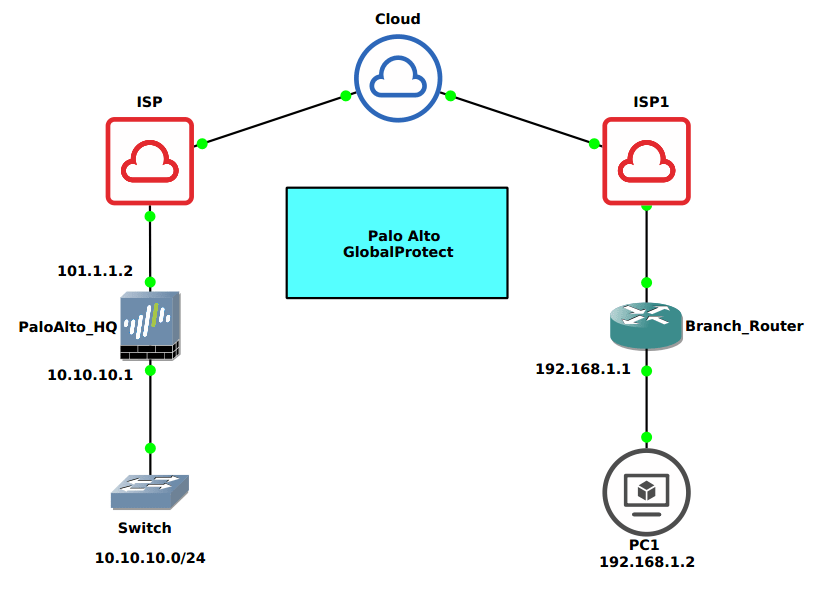
A scenario for GlobalProtect VPN
In this article, we will use a Public IP address (i.e. 101.1.1.2) which is assigned on the Palo Alto Firewall interface. Clients need to connect their GlobalProtect to this public IP address. A client on the Branch site can access corporate resources using the GlobalProtect VPN.
Steps need to configure GlobalProtect VPN
I am starting the configuration with basic steps. You can skip any step if you have already knowledge related to a particular step.
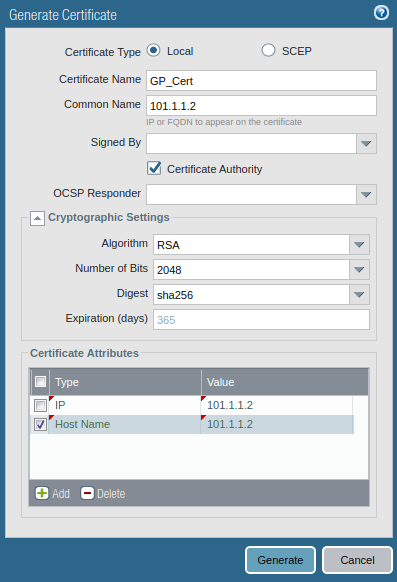
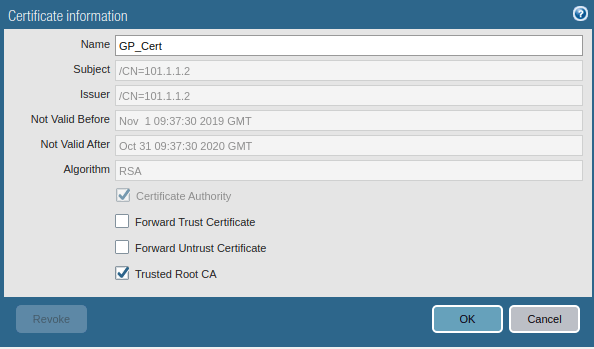
Generating a Self Sign Certificate for GlobalProtect
To configure the GlobalProtect VPN, you must need a valid root CA certificate. So, you can generate your certificate on the Palo Alto firewall or you can use any certificate which is signed by any of the CA authority. To generate a self-sign certificate, Go to Device >> Certificate Management >> Certificates >> Device Certificates >> Generate. Now, just fill the Certificate filed as per the reference Image. Make sure you put your Public IP address on the Common Name field.
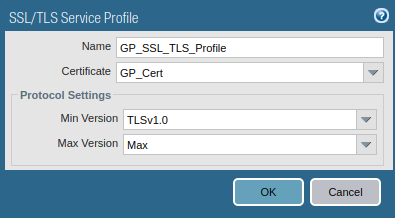
Creating an SSL/TLS Service Profile
Now, you need to create an SSL/TLS profile that is used for portal configuration. So, Go to Device >> Certificate Management >> SSL/TLS Service Profile >> Add. Select the certificate you just created and the minimum and maximum version of TLS.
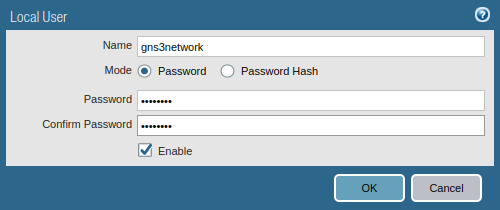
Creating Local Users for GlobalProtect VPN Authentication
GlobalProtect VPN needs to be authenticated during the VPN connection process. If you are running LDAP in your environment, you can integrate GlobalProtect VPN with your LDAP Server. For now, I’m creating a local user. Go to Device >> Local User Database >> Users and click on Add.
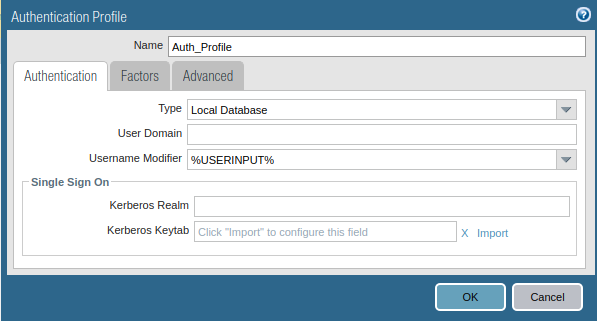
Creating Authentication Profile for GlobalProtect VPN
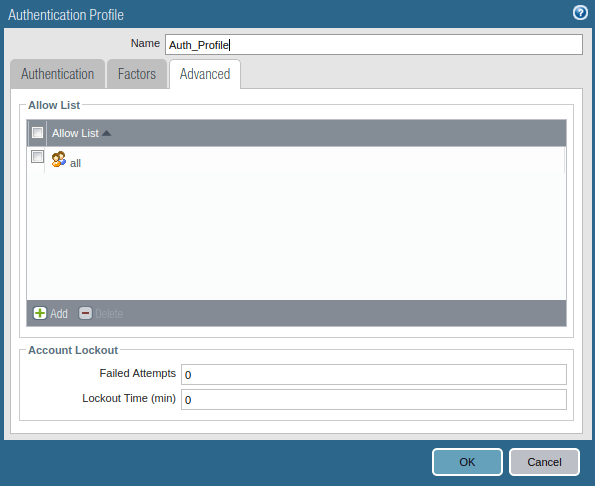
Now, you need to create an authentication profile for GP Users. Go to Device >> Authentication Profile and click on Add. Access the Advanced tab, and add users to Allow List. Just follow the steps and create a new Authentication profile.
Creating a zone for GlobalProtect VPN Traffic
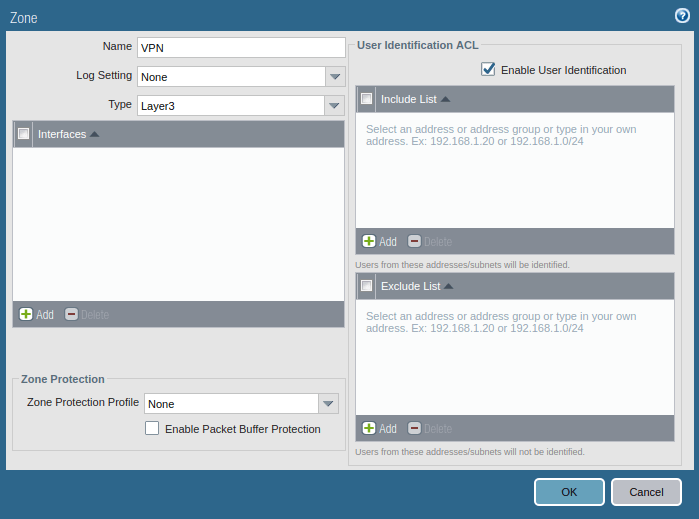
Like IPSec VPN, in GlobalProtect VPN, you need to create a zone for the tunnel interface. Although you can choose one of the pre-created zones, it is always recommended to create a new zone so that you have granular control over the GlobalProtect traffic. To create Security Zone, go to Network >> Zones >> Add. Make sure the Zone Type should be Layer 3 and Enable User Identification.
Creating a tunnel interface for GlobalProtect
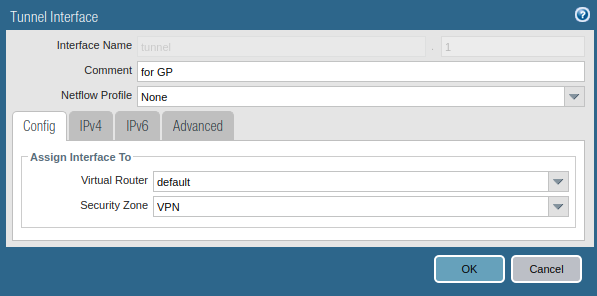
Likewise IPSec tunnel, you need to create a separate tunnel interface for the GlobalProtect VPN. Go to Network >> Interfaces >> Tunnel >> Add, to create a tunnel interface. Also, make sure you assign the same security zone which is created in the previous step. You can attach a management profile to the tunnel interface as per your requirement. Although, you do not need to assign an IP address to this interface.
Portal Configuration for GlobalProtect
Now we will start configuring the actual configuration for GlobalProtect. Go to the GlobalProtect >> Portals >> Add. Access the General tab and Provide the name for GloablProtect Portal Configuration. Below this in Network Settings, select the interface on which you want to accept requests from GlobalProtect client.

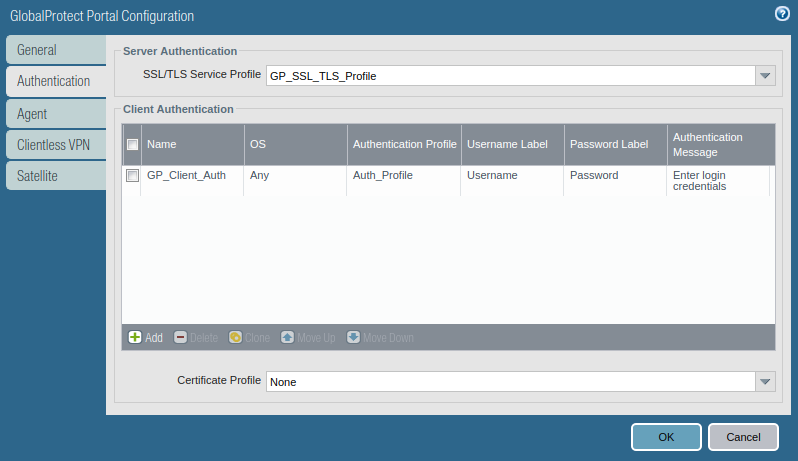
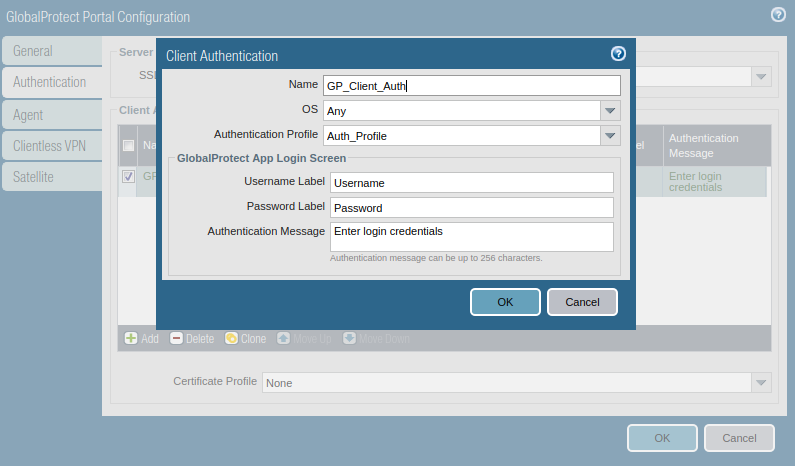
Access the Authentication Tab, and select the SSL/TLS service profile which you are created in Step 2. In Client Authentication, click on ADD. Here, you need to define a user-friendly name for Client Authentication and select the Operating Systems on which you want to run GlobalProtect. Also, select the Authentication Profile which was created in one of the previous steps.
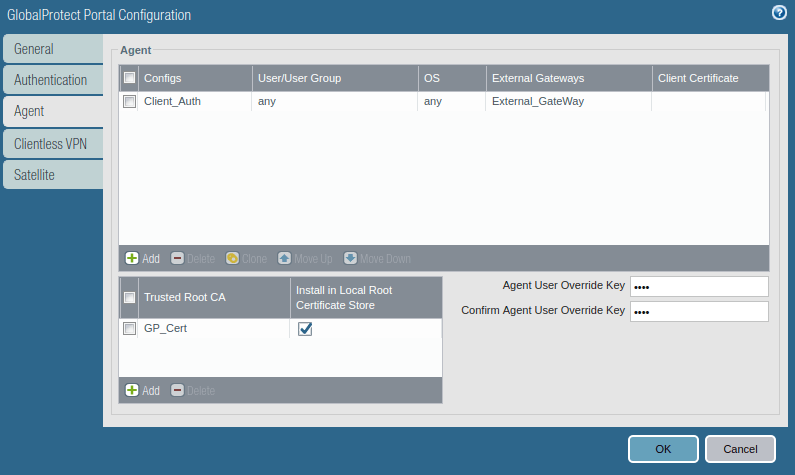
Now, access the Agent tab, and select the Trusted Root CA (created in Step 1), and check the option “Install in Local Root Certificate Store”. After this, click on Add Agent. Provide a user-friendly name for the agent.

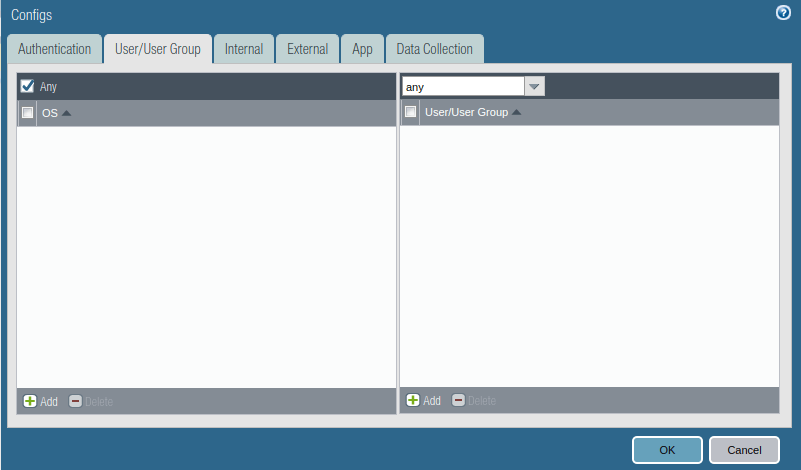
Access the User/User Group tab and select OS and User/User Group you have in your environment. In this example, I am using the ANY, ANY option.
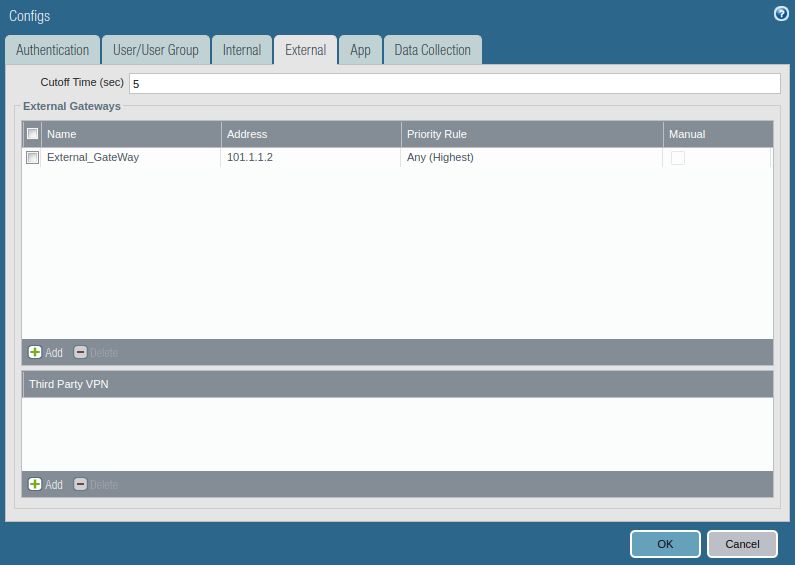
Access the External tab, and Add an External Gateway. Give the Name to External Gateway and provide IP, Source Region, and Priority details and click OK.
Gateway Configuration for GlobalProtect
After the GlobalProtect portal configuration, we need to configure the Gateway Configuration for GlobalProtect VPN. Access the Network >> GlobalProtect >> Gateways and click on Add. Give the name to GP Gateway and In the Network Settings, define the interface on which you want to accept the requests from GlobalProtect.

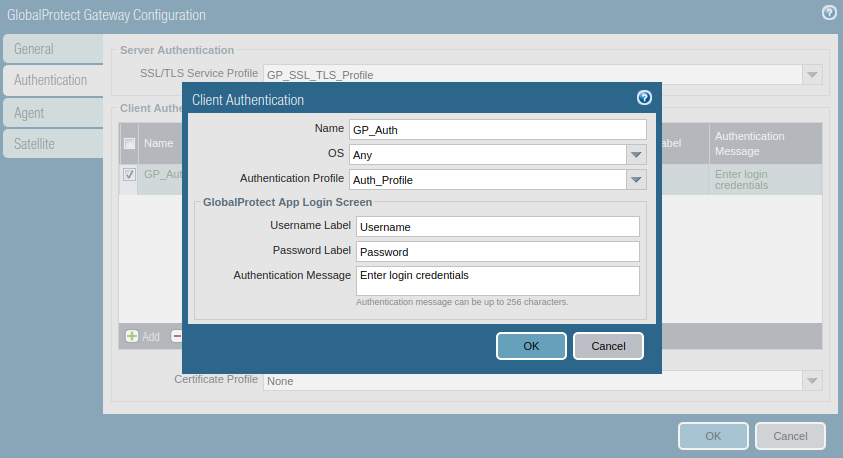
Access the Authentication tab, select the SSL/TLS service profile, and click on Add to add a client authentication profile. Here, you need to select Name, OS, and Authentication profile.
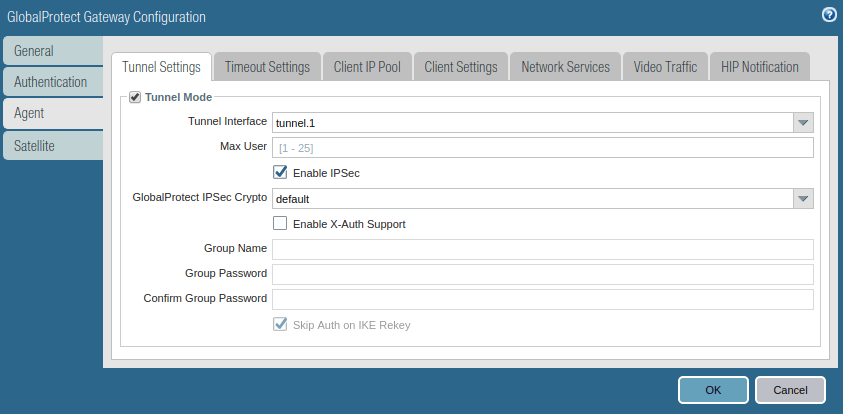
Access the Agent tab, and Enable the tunnel mode, and select the tunnel interface which was created in the earlier step.
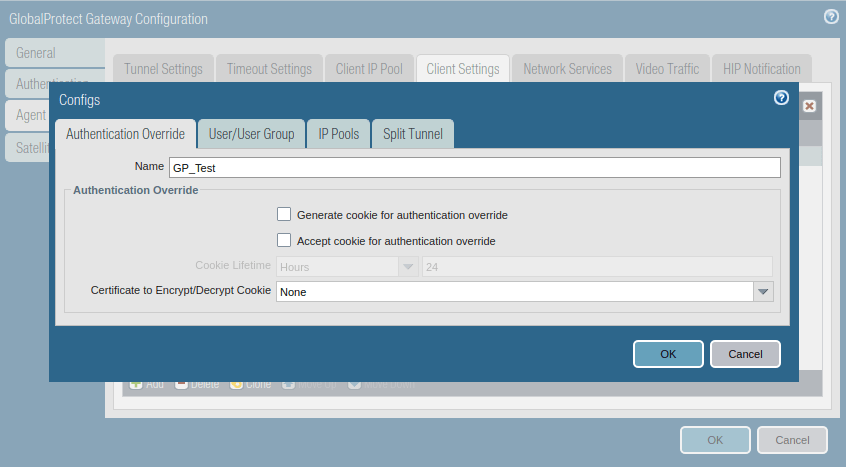
Access the Client Settings tab, and click on Add. Just, give a user-friendly name to this.
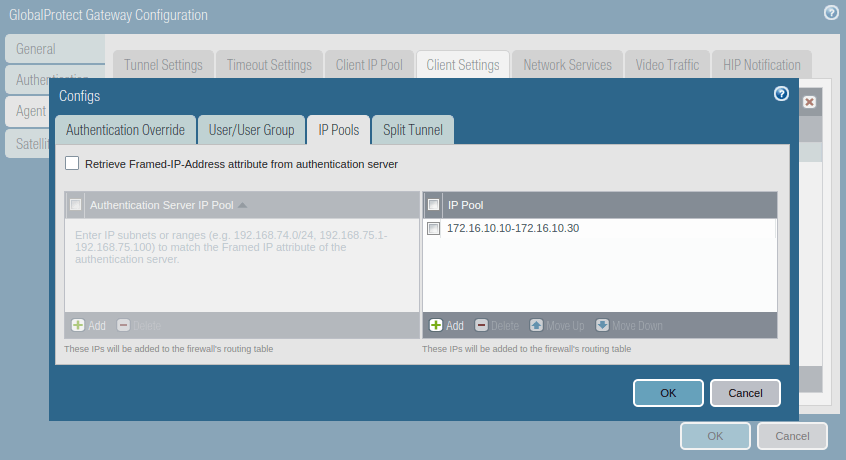
Now, access the IP Pools and assign an IP subnet or IP range which is used to assign the IP address once the client successfully authenticates the GP authentication.
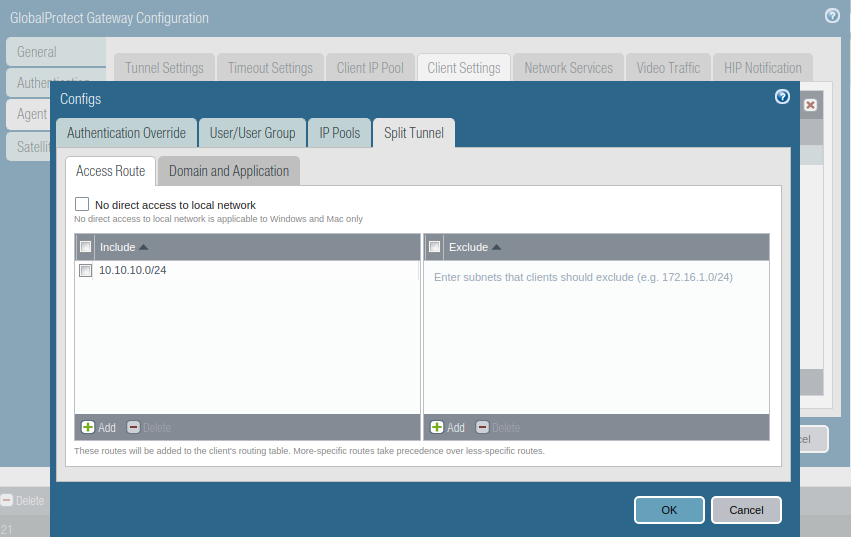
Access the Split Tunnel tab, and Include all networks you want to gives access to remote clients. For all routes, you need to provide a 0.0.0.0/0 network. For this example, I just configure my LAN network which is 10.10.10.0/24.
Security policy for GlobalProtect
If you created a new zone for the GlobalProtect tunnel interface, then you must define the security policies to allow the traffic from the tunnel interface. Although, if you put the tunnel interface in Trust or Inside security zone, for example, you do not need to define the security policy for InteraZone traffic. To create a security policy, access the Policy >> Security and click on Add.
NAT Policy for GloabalProtect clients
If you want to provide Internet access to the VPN client through your corporate office, you must have to create a Source NAT (Network Address Translation) rule. You need to select your security zone (which is created in an earlier step) as the source zone and the destination zone should be your internet-facing zone. To create NAT rule access Policies >> NAT and click on Add.
Verification of GlobalProtect Configuration and Accessing defined Routes from Client Machine
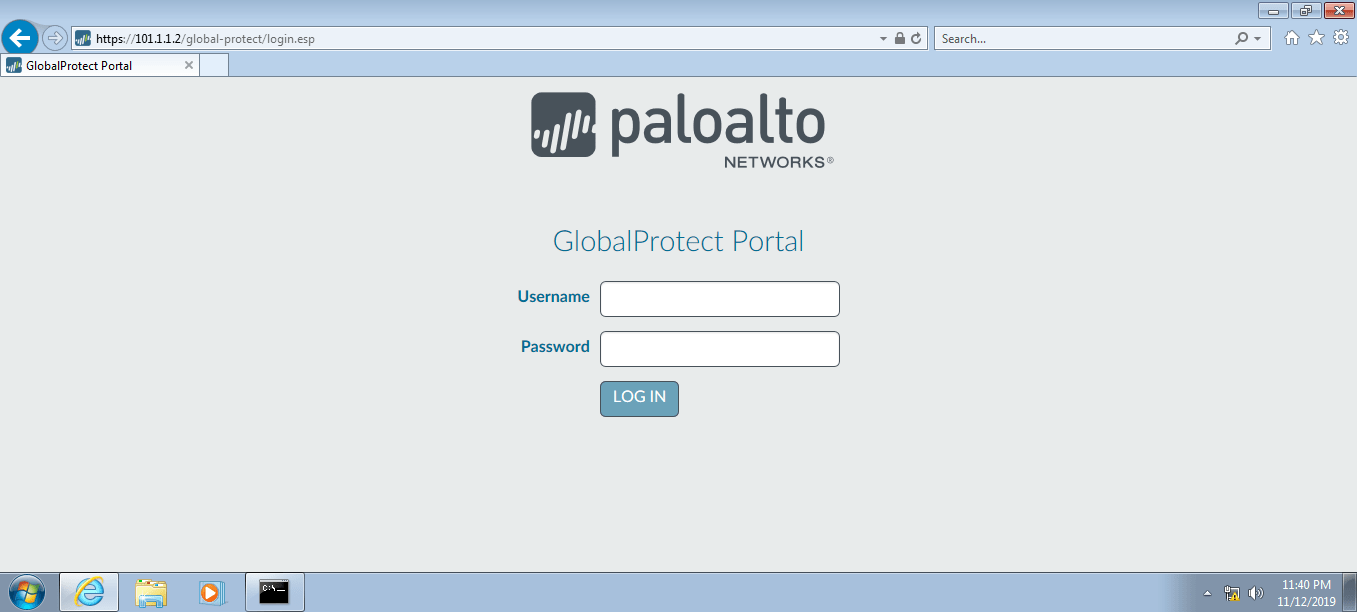
So far we have configured GlobalProtect VPN in Palo Alto Firewall. Now, we will test our configuration by accessing the GlobalProtect agent from a client machine. You must download the GP agent on the client machine directly from the support portal, or you must have a GP agent on your firewall itself. You can access the GlobalProtect portal by access the public IP of firewall i.e. https://101.1.1.2 in my case.
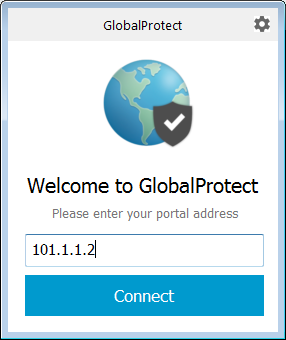
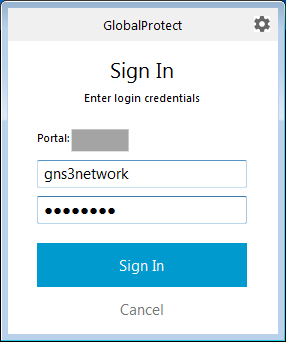
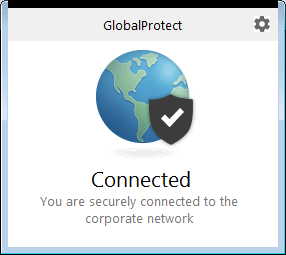
I already downloaded a GP agent from the support portal and installed it on my test machine. Once, you installed the GP agent, open it and try to connect it on your firewall Public IP. If the configuration is correct, it will prompt for username and password. Once you type the username and password, it will automatically connect to the firewall and you can access corporate resources using GlobalProtect.
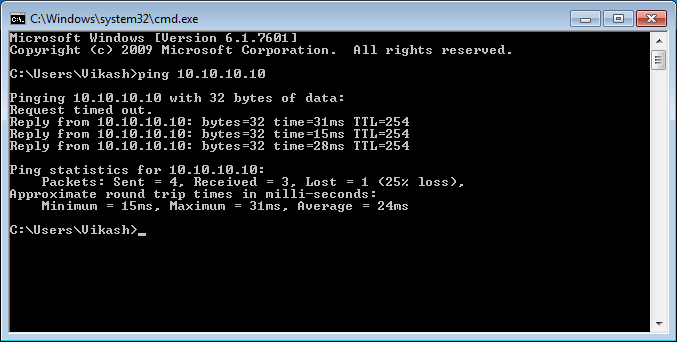
Now, we will test our configuration by access an internal system. I have a router on my LAN segment and I can directly access that Router by using private IP. You can try to access the firewall using it’s LAN segment.
Video Guide to Configure GlobalProtect VPN on Palo Alto Networks Firewall
Video Source: Palo Alto Networks
Related Articles
Summary
In this article, we discuss how you can configure GlobalProtect VPN in the Palo Alto firewall. We configured the GlobalProtect VPN from basics to advanced steps. You need to define a certificate, GlobalProtect Portal and GlobalProtect Gateway. Additionally, you required security policies to allow the traffic which is received from the GlobalProtect tunnel interface.
Did you found this article helpful? Please share this article on social platfroms using given links and shows us some love.Thanks!
Great document. This was really helpful. Thank you.
Thanks, Guillermo! Glad to know this helps you.
Nice write up, thx!
i have configured global protect with source and destination zone set to any, any, GP client connects successfully. but if i define source and destination zone in security policy. GP client not connecting.
Hi Adnan,
You need to check what zone you assigned to the Tunnel Interface. After, you need to configure the Security Policy from source zone (same as tunnel interface zone) to the Destination Zone.
Hello,
Since ethernet1/1 is internet and ethernet1/2 is to the internal network.
Would a misconfiguration cause any downtime? Or would it just render GlobalProtect to not work?
Thanks
Hi Emil,
Ethernet1/1 & ethernet1/2 are just kept for an example. It could be different in a real-time scenario.
Also, suppose, you configured DNAT rules for an IP which used in Portal. Then it may cause the intermediate downtime. So, please understand the full topology and then only configure GlobalProtect.
Please let me know if you need further help.
hello
what kind of nat rules have to made if gp users internet shoukd work from my office
This was very helpful. I have tried for months to get GP running and this finally got me in the right direction.