
In this article, we will configure Policy Based Forwarding (PBF) on Palo Alto Networks Firewall. PBF allows us to bypass the routing table and routes the traffic/packets based on the applied policy.
PBF policy allows us to define the source, destination, application, and service filters. If the request matches the policy, the firewall will override the routing table and forwards the traffic via a different link without tweaking the routing table.
Let’s start configuring the Policy Based Forwarding.
How to configure Policy Based Forwarding (PBF) on Palo Alto Networks Firewall
Before moving to the configuration part, let’s first understand the scenario. I’ve two ISPs directly connected with my Palo Alto Networks Firewall. ISP1 is a Primary link that provides great bandwidth, however, ISP2 is a backup link with less bandwidth.
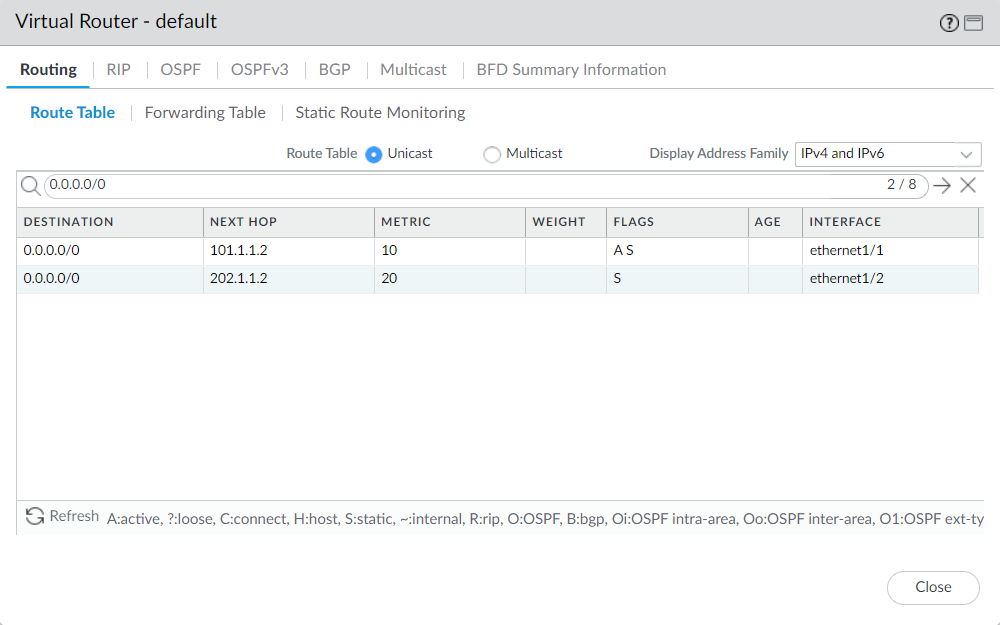
I’ve configured the first default route towards ISP1 with metric 10. Another default route is configured toward ISP2 with metric 20. We will use ISP2 to route our non-critical business applications such as HTTP, HTTPS, etc using Policy Based Forwarding.

The static routes configured on the Firewall:
Step1: Configure the Monitor Profile on Palo Alto Networks (optional but recommended)
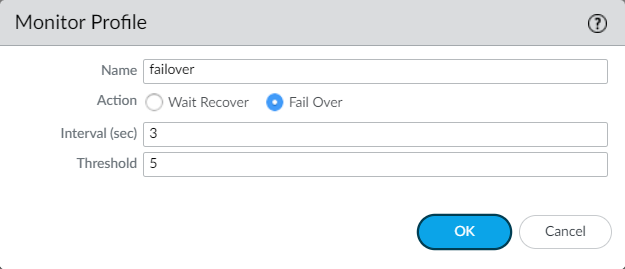
First, we will configure the Monitor Profile under Network Profile. It will help us to decide once the next hop is unreachable from the firewall.
Navigate to Network > Network Profile > Monitor Profile and click on Add. Now, define the name of the Monitoring profile, i.e, failover. Set Action Wait Recover or Failover. Keep the Interval & Threshold same.
Step2: Configure the PBF Policy in Palo Alto Networks
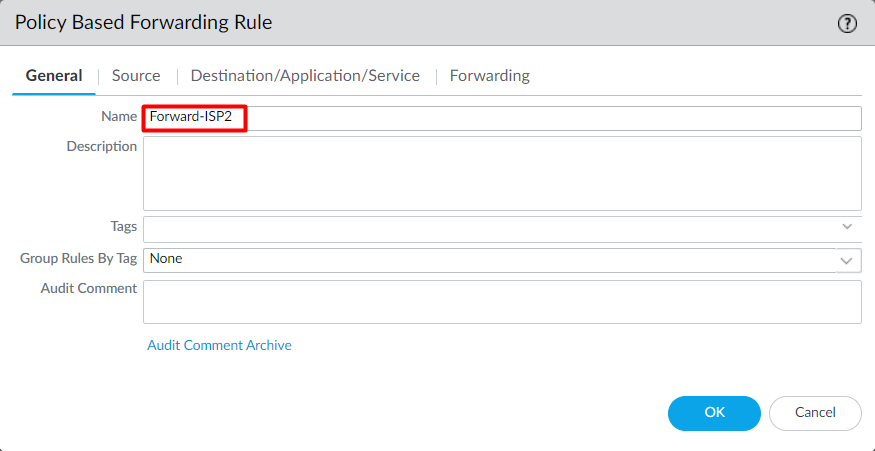
Login to Palo Alto Networks Firewall and navigate to Policy > Policy Based Forwarding and click on Add. In the General tab, define the PBF name, i.e., Forward-ISP2.
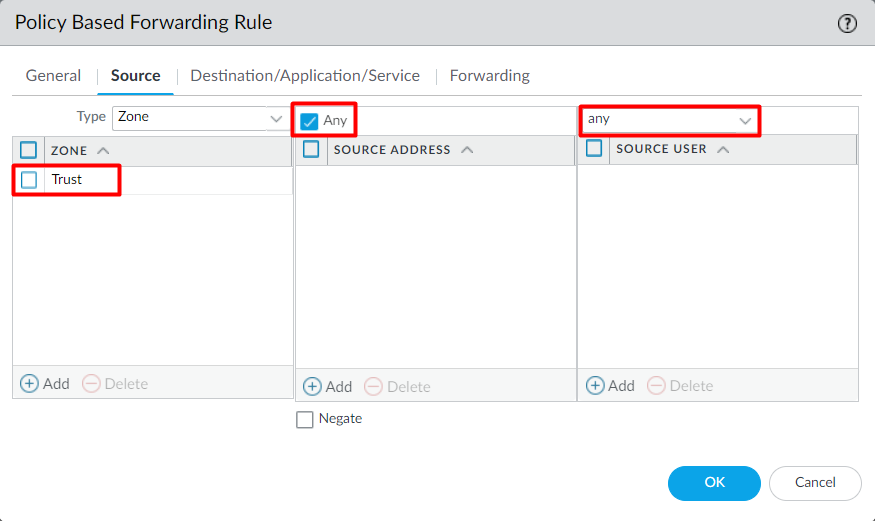
Now, click on the Source tab, and define the Source Zone to Trust, optionally you can define the source address & source users. For this example, I’m using ANY.
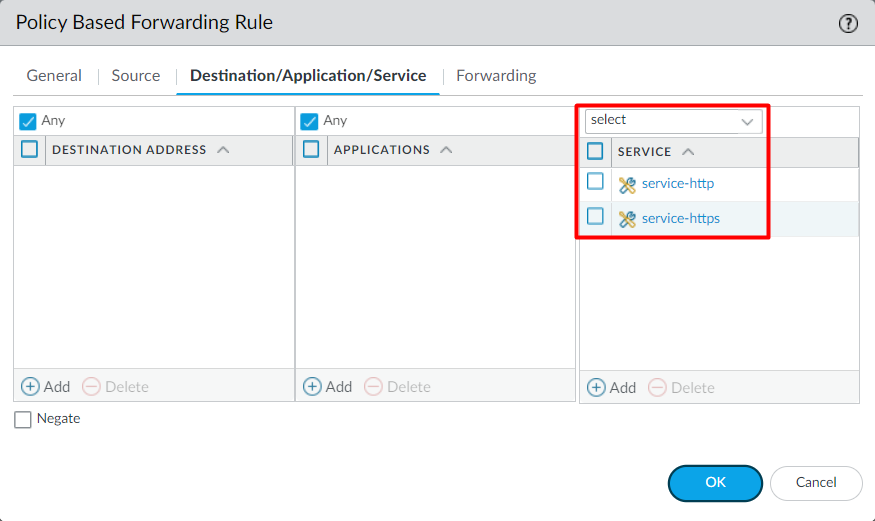
Click on the Destination/Application/Service tab, and define the required Destination addresses, Applications, and services. Just to keep this article simple, I’m only using HTTPS/HTTP.
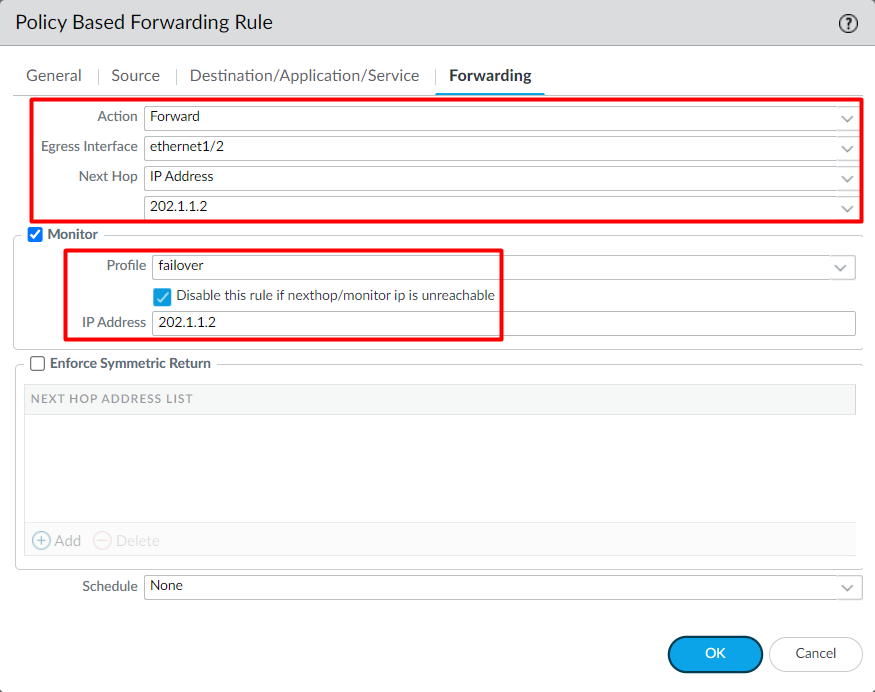
Click on the Forwarding tab and define the Action, Egress Interface & Next Hop IP Address. I’m configuring the Action to Forward, Egress Interface to ethernet1/2, and Next Hop to IP Address – 202.1.1.2.
Finally, check the Monitor checkbox, and select the Monitor Profile, click Disable this rule if nexthop/monitor IP is unreachable. In the IP Address field, I’ve selected the Next-Hop ISP IP.
Now, click on OK to complete the changes.
Step3: Configure the Security & NAT Policy to allow the traffic in Palo Alto Networks
PBF helps us to bypass the defined routing information. However, we still need to create a security policy to allow traffic from the source to the destination zones. Navigate to Policy > Security and click on Add to create a new security policy.

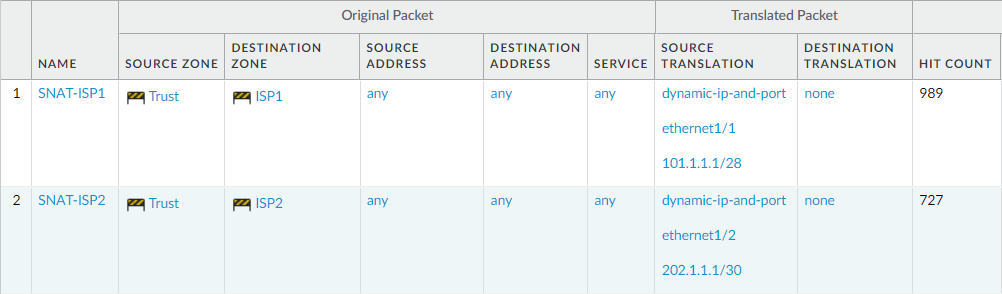
Now, create a Souce NAT Policy to translate the Private IP Address to Public IP Address. Navigate to Policy > NAT and click on Add to create a new security policy.
Step4: Commit the changes on Palo Alto Networks Firewall
Finally, we have configured the Policy Based Forwarding (PBF) on Palo Alto Networks Firewall. We need to perform the commit to save the candidate configuration to the running configuration.
Navigate to the Top Right Corner and click on Commit.
Step5: Verifying the Policy Based Forwarding (PBF)
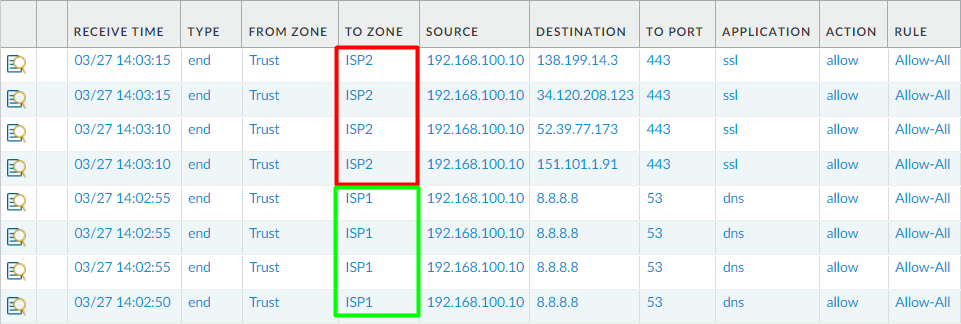
In this section, we will verify our configuration by viewing the traffic logs. Navigate to Monitor > Traffic. You will find that all Web-browsing traffic (HTTP&HTTPS) is using the ISP2 to exit.
Thats it! We have successfully configured PBF on Palo Alto Networks Firewall.
Useful commands for managing Policy Based Forwarding on Palo Alto Networks
In this section, we will discuss a few Palo Alto Networks commands to manage the PBF. To check the Policy based forwarding policies, we can simply run the below command:
|
1 2 3 4 5 |
admin@PA-850> show pbf rule all Rule ID Rule State Action Egress IF/VSYS NextHop NextHop Status ========== ===== ========== ======== ================== ======================================= ============== Forward-IS 1 Active Forward ethernet1/2 202.1.1.2 UP |
You can filter the ongoing sessions using the below command:
|
1 2 3 4 5 6 7 8 |
admin@PA-850> show session all filter pbf-rule Forward-ISP2 -------------------------------------------------------------------------------- ID Application State Type Flag Src[Sport]/Zone/Proto (translated IP[Port]) Vsys Dst[Dport]/Zone (translated IP[Port]) -------------------------------------------------------------------------------- 19989 ssl ACTIVE FLOW NS 192.168.100.10[40736]/Trust/6 (202.1.1.1[53971]) vsys1 34.215.11.44[443]/ISP2 (34.215.11.44[443]) |
To view the entire PBF session information, run the below command:
|
1 2 3 4 5 6 7 8 9 10 11 12 13 14 15 16 17 18 19 20 21 22 23 24 25 26 27 28 29 30 31 32 33 34 35 36 37 38 39 40 41 42 43 44 45 46 47 48 49 50 51 |
admin@PA-850> show session id 19989 Session 19989 c2s flow: source: 192.168.100.10 [Trust] dst: 34.215.11.44 proto: 6 sport: 40736 dport: 443 state: ACTIVE type: FLOW src user: unknown dst user: unknown pbf rule: Forward-ISP2 1 s2c flow: source: 34.215.11.44 [ISP2] dst: 202.1.1.1 proto: 6 sport: 443 dport: 53971 state: ACTIVE type: FLOW src user: unknown dst user: unknown start time : Mon Mar 27 14:02:51 2023 timeout : 1800 sec time to live : 1558 sec total byte count(c2s) : 2136 total byte count(s2c) : 4084 layer7 packet count(c2s) : 11 layer7 packet count(s2c) : 8 vsys : vsys1 application : ssl rule : Allow-All service timeout override(index) : False session to be logged at end : True session in session ager : True session updated by HA peer : False address/port translation : source nat-rule : SNAT-ISP2(vsys1) layer7 processing : completed URL filtering enabled : False session via syn-cookies : False session terminated on host : False session traverses tunnel : False session terminate tunnel : False captive portal session : False ingress interface : ethernet1/3 egress interface : ethernet1/2 session QoS rule : N/A (class 4) tracker stage l7proc : ctd decoder done end-reason : unknown |
Since we have configured the network monitor profile, the Policy Based Forwarding will go down once the Next-Hop IP Address, i.e, 202.1.1.2 is unreachable.
|
1 2 3 4 5 |
admin@PA-850> show pbf rule all Rule ID Rule State Action Egress IF/VSYS NextHop NextHop Status ========== ===== ========== ======== ================== ======================================= ============== Forward-IS 1 Active Forward ethernet1/2 202.1.1.2 DOWN |
You will get the log messages under Monitor > Logs > System.
Related Articles
- Palo Alto Networks – Initial Configuration from GUI & CLI
- How to Configure DHCP Relay on Palo Alto Firewall
- How to Configure Static Route on Palo Alto Firewall
- SSL Decryption on Palo Alto Next-Generation Firewall
- How to configure IPSec Tunnel between Palo Alto and SonicWall Firewall
- How to configure IPSec VPN Between Cisco ASA and Palo Alto Firewall
- Destination NAT | DNAT in Palo Alto Networks Firewall
- How to Configure GlobalProtect VPN on Palo Alto Firewall
Reference
Summary
In this article, we have configured Policy Based Forwarding (PBF) on Palo Alto Networks Firewall. We have tested the failover scenario as well. Firstly, we configured a monitor profile and then use this monitor profile in the PBF rule. Further, we created the security and nat rule to allow and forward the network traffic using our Public IP. At last, we have discussed a few Policy Based Forwarding commands to manage PBF.
I hope you like this article. Please share it on social media platforms and show us some love 🙂
Thank you for sharing your knowledge.
if we have only one ISP, can we implement PDF?