
In this article, we will discuss how we can connect our GNS3 appliances with the internet. Many times, we want to communicate our virtual appliances to communicate with the Internet. You can also connect your virtual appliances with real appliances using this technique. This can enhance your learning experience with GNS3 (Graphical Network Simulator).
To achieve this goal, we have two different techniques and both are builtin with GNS3 itself. First one is NAT, which provides you one-way connectivity i.e. you can communicate with the Internet but, no one can communicate from Outside (i.e. Internet). The second method is cloud appliance in End Point Device group, which allows you to communicate bi-direction. First, we will discuss, about NAT technique and later on, we will discuss Cloud appliance which can help us to make communication bi-direction. So, let’s start!
How to connect GNS3 Appliances to the Internet using NAT
Before starting here, you must know about NAT. I’m assuming you know about NAT (Network Address Translation). In order to connect your GNS3 appliances with Intenet, you have to choose NAT appliance from End Point devices and connect it to the Layer 3 device (i.e. Router, Firewall). Basically, NAT appliance will provide you an IP address from which you can access the whole Internet. So, when you connect a Router or Firewall with this device, by default, you will get a default route towards, this NAT appliance which further use it to communicate with the Internet.
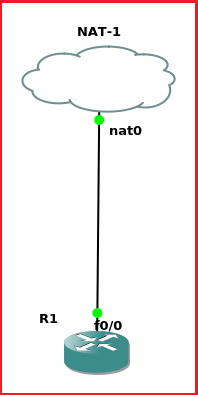
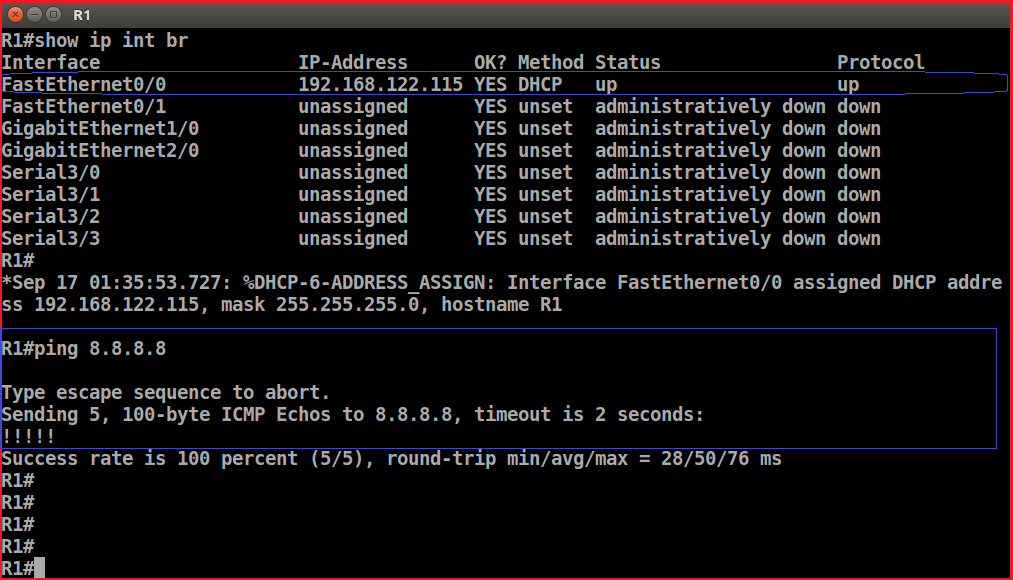
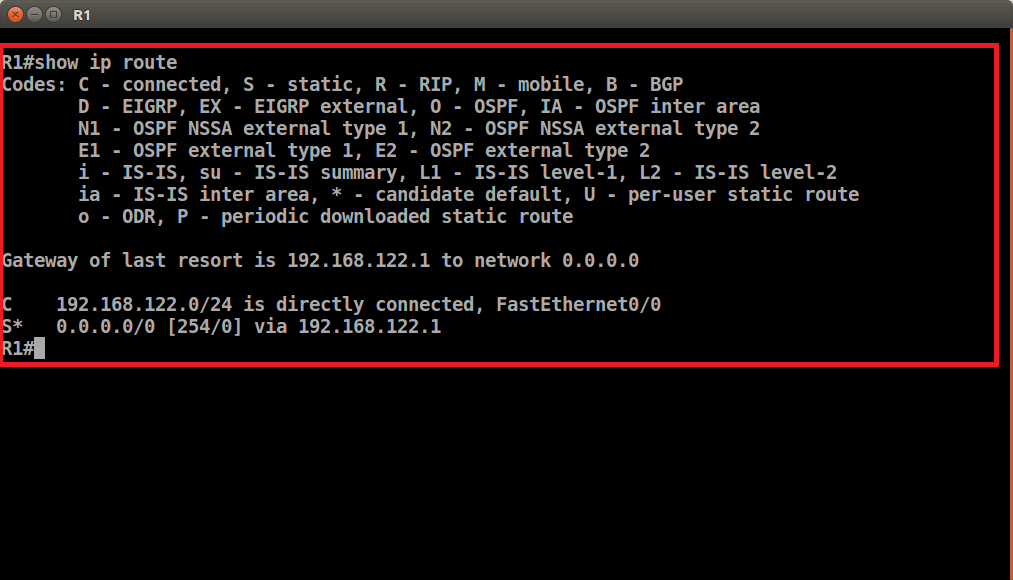
Here, in this simple scenario, I just connected the router f0/0 interface to nat0 node and configure the router interface to get an IP address using DHCP. Now, the Router will get the IP address using DHCP and it also has a default route towards NAT cloud.
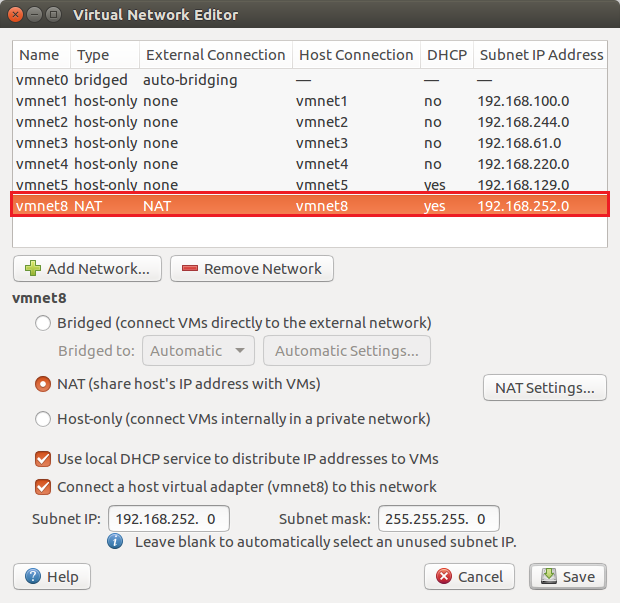
However, if you have VMWare in your system, you can configure any one virtual interface for NAT. You just need to open Virtual Network Editor and you can configure any virtual network interface (i.e vmnet1, vmnet2, etc.) as NAT. After this configuration, you can put cloud from End Device group in GNS3 and use it as a NAT device. Now, it will provide you connectivity to the Internet.
How to connect GNS3 Appliances to the Internet using Cloud
We have already discussed how we can connect our GNS3 appliances with the Internet. But, the limitation is that our internal hosts can communicate with the Internet. But, you can’t establish a connection from outside to internal devices. So, we will go through another method which can be used for bi-directional communication.
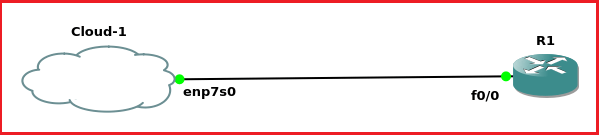
In this scenario, you just need to pick a default cloud in GNS3 and connect the local Interface with the Router or Firewall. Here, my ethernet interface is enp7s0 and it’s connected with interface f0/0 of Router R1. Here, also the interface is configured as a DHCP client and hence get an IP address automatically but this time, the default route will be the same as the system default route.
Advantage of using the Internet for GNS3 Appliances
If you want to simulate complex network design on gns3, it will help you to virtualize almost everything which is in your real network. For example, you can block or allow particular network traffic from particular or all hosts in a network using a Firewall. You can analysis traffic behavior using Wireshark. You can also connect your real appliances with virtual one and you can make fun with networking!
Limitation of using the Internet for GNS3 Appliances
For bi-direction connectivity, you must use LAN/ Wired connectivity with the system.
With all the mentioned advantages, there are some limitations with GNS3 Virtualization. The biggest limitation is that you can’t get bandwidth as in real appliance. If you are planning to use your wireless network Also, if you are planning to design a complex network, you must need a system with high configuration (i.e. RAM and CPU).
Summary
In this article, we have discussed how we can connect our virtual appliances with the Internet. Further, we also discussed, how we can monitor, analysis and control network traffic from a specific network or host. We also discussed some advantages and limitation of GNS3 virtualization.
Hope you find this article helpful! Please comment in comment box if you like this article.
How do I communicate the virtual gns3 topology to real-world devices? So For my virtual host in gns3 I need to write a socket in python. But how can socket be written to virtual host? I searched and could not find. My goal is to communicate with devices in any real-world network with this virtual host. Please help me..
Hi Looney,
You need to take a cloud from the virtual nodes which are pre-installed in GNS3. After the, connect your real LAN interface with the Router. Login to the router and give IP from DHCP. The router will automatically get your LAN subnet IP. After this, it can communicate with real-world devices.
Hi,
I’m trying to be able to ping from my network devices in GNS3, to google and other devices in the real world. I run GNS3 locally on VMware, so i guess i need to mess around with some of the settings in the virtual network editor, like you do when connecting using NAT. But, i get the impression that if i establish connection following your NAT guide i will only be able to ping out to devices, but not get an answer back. Is that correctly understood?
Your cloud guide does not do anything with the virtual network editor settings and it does not result in me being able to ping outside devices. Any help will be highly appreciated 🙂