
In this article, we will deploy the pfSense Firewall in VMWare Workstation. As you already know, the pfSense Firewall is an open-source firewall. pfSense Firewall gives you complete visibility up to layer 4 of the OSI Model. Apart from this, you can configure common firewall services such as VPN, Captive Portal, DNS, DHCP, SSL Decryption, URL Filtering, etc. So, this article explains to you how you can deploy pfSense in VMWare Workstation. So, Let’s Start!

How to Deploy pfSense Firewall in VMWare Workstation
As we already discussed, pfSense is an open-source firewall, so it is completely free to download and use. You can deploy the pfSense in VMWare Workstation, VMWare ESXi, Hardware ( such as a computer, server, laptop), etc. But, if you want to learn pfSense, I recommend you to install pfSense in VMWare Workstation. You need to follow the following detailed steps to install pfSense in VMWare Workstation.
Video Guide to Download and Install pfSense in VMWare Workstation
You can follow this video to download and install pfSense in VMWare.
Don’t forget to subscribe to this channel !
[embedyt] https://www.youtube.com/watch?v=luzV9-qHrPw[/embedyt]
Download pfSense Firewall for VMWare Workstation (ISO Image Installer)
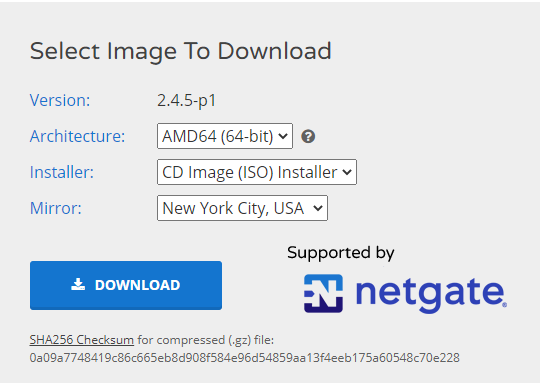
First of all, you have to download the pfSense Firewall ISO Image from the official pfSense website. To download pfSense ISO Image, you need to visit, pfSense Firewall. Once you click on the link, you need to follow the below screenshot to initiate the downloading progress.
Note: pfSense firewall is based on Free BSD operating system that is a Unix-like operating system.
Download and Install VMWare Workstation
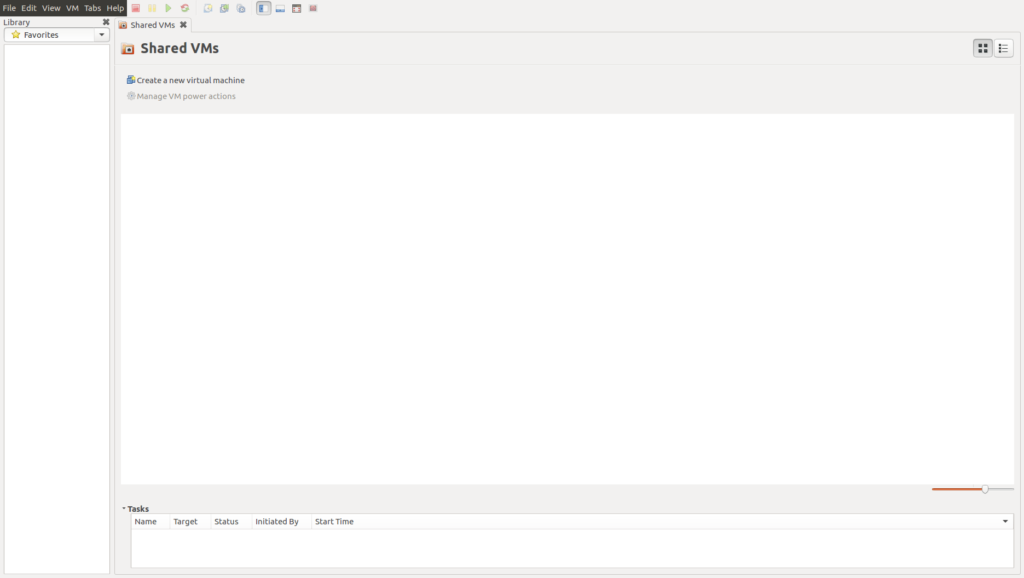
After downloading the pfSense Firewall ISO image, you must have to download and install VMWare Workstation. If you already installed it, just skip this step. To download VMWare Workstation, visit the official website VMWare Workstation. By default, you get 30 days evaluation period, after that, you can purchase it. Once you have installed it, it will be looks like the below image:
Step 3: Configuring your Virtual Network Interfaces for pfSense Firewall
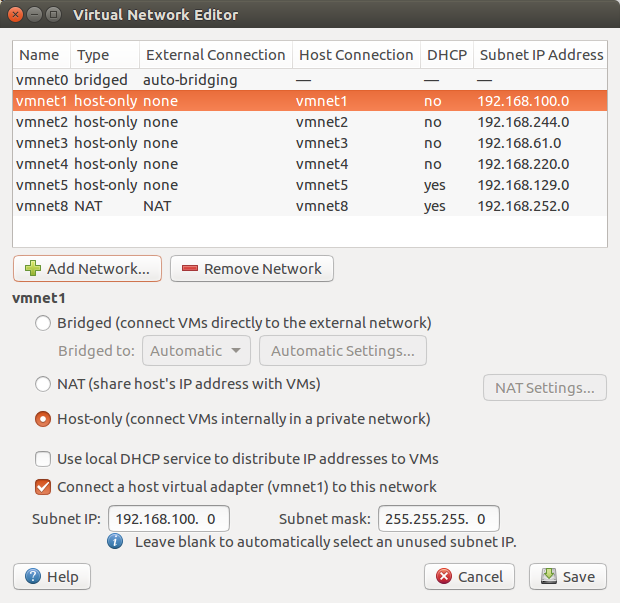
Now, it’s time to configure your Virtual Network Adaptors as per your requirements. By default, there are only two virtual network interfaces, i.e., VMNet1 and VMNet8. So, click on Windows Start Button and search for Virtual Network Editor. If you are using Linux (i.e. Ubuntu, Mint, etc.) you can type the below command to open Virtual Network Editor. Click on the Add Network and make your virtual interface host only. After that, you have to provide the IP address. For example, I am going to use 192.168.100.0/24 for the vmnet1 interface.
[terminal]sudo vmware-netcfg[/terminal]
Step 4: Deploy the pfSense Firewall in VMWare Workstation
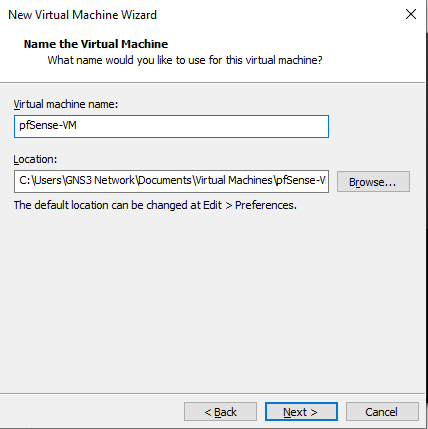
Now, we will deploy the pfSense Firewall in VMWare Workstation. We will use the same file which was downloaded in step 1. You need to open the VMWare workstation and navigate to File >> New Virtual Machine (Ctrl+N). Once you click on New Virtual Machine, a New Virtual Machine wizard will open as below image.

You need to continue on the Typical option and click on the Next button. Now, you need to select the pfSense Installer image, which was downloaded in step 1. Select the Installer disc image file (iso) and select the pfSense ISO file and click on Next.

Now you need to give a friendly name to your pfSense Firewall VM, I am giving pfSense-VM in my case. The default VM directory is “C:\Users\user_name\Documents\Virtual Machines\“. If you want to change the default directory, you can change it.
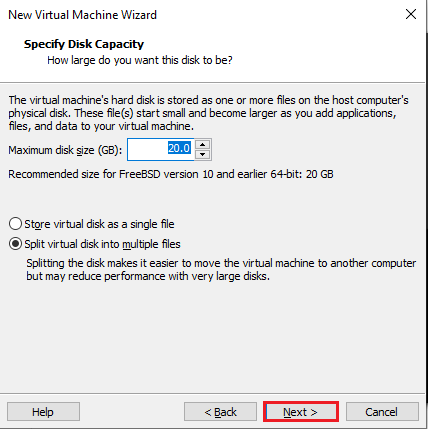
Now, you need to configure the disk for your pfSense VM. Since you want to practice on it, so let’s continue with the default value.
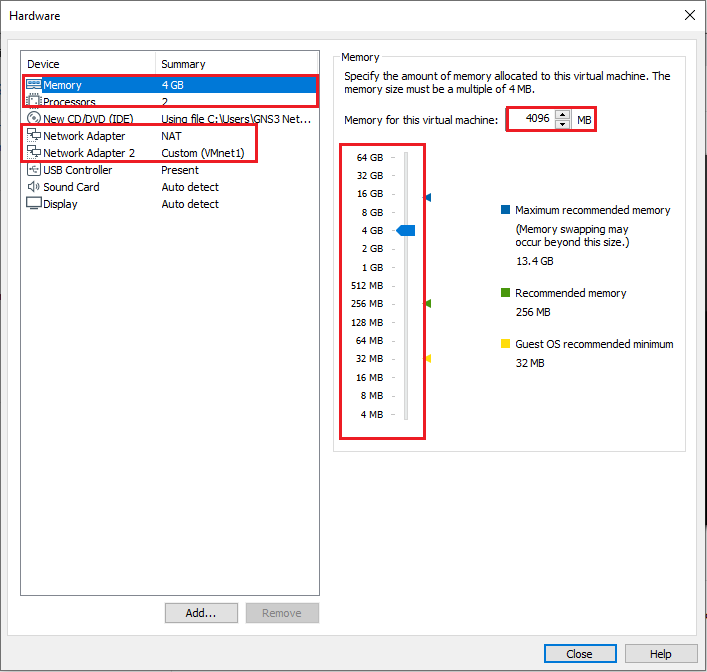
By default, you will found that only a single network adaptor ‘NAT’ is configured, so, you need to add one extra interface, i.e. vmnet1, in my case. You can click on customize hardware to change it.
If you have a higher configuration system, then, I’ll recommend you to configure at least 4 GB of RAM and 2 Core of CPU. But, In case you have fewer resources, you can continue with 1 Core of CPU and 1 GB of RAM. Click on Customize Hardware and change it.
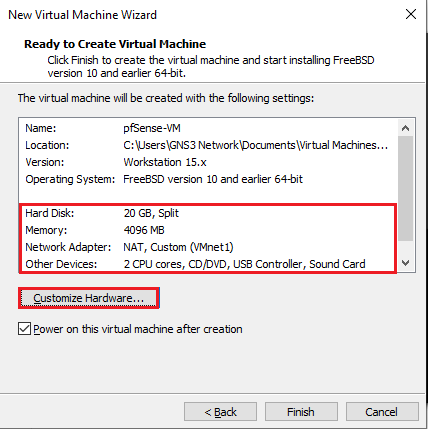
Now, click on Finish to start the VM.
Step 5: Installation Process of pfSense Firewall
Once you deploy the pfSense in VMWare Workstation, you will need to install the pfSense Firewall, just like any operating system.
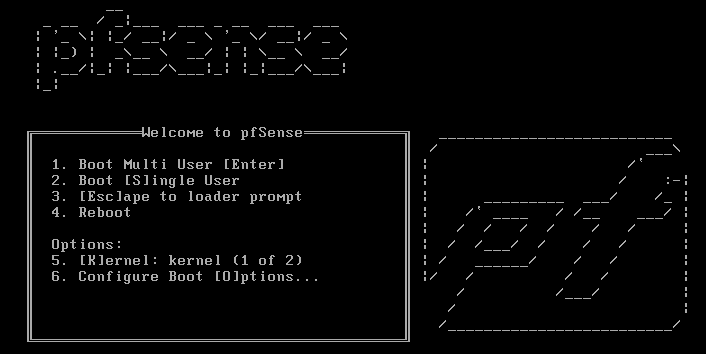
First, you will find the Boot Menu, along with the pfSense logo. You need to continue on the boot process till you get copyright and distribution notice.
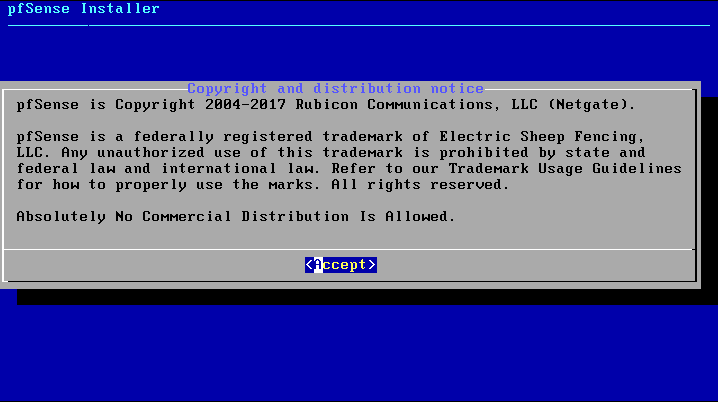
You will get copyright and distribution notice, you need to Accept it.
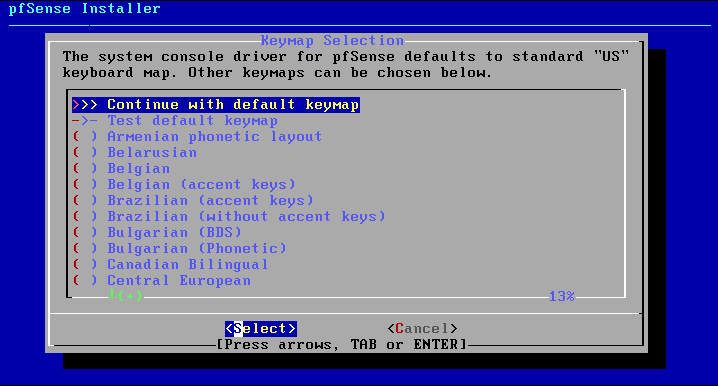
Now, you need to select the keymap during the installation process. Let’s keep it default and continue by clicking the select button.
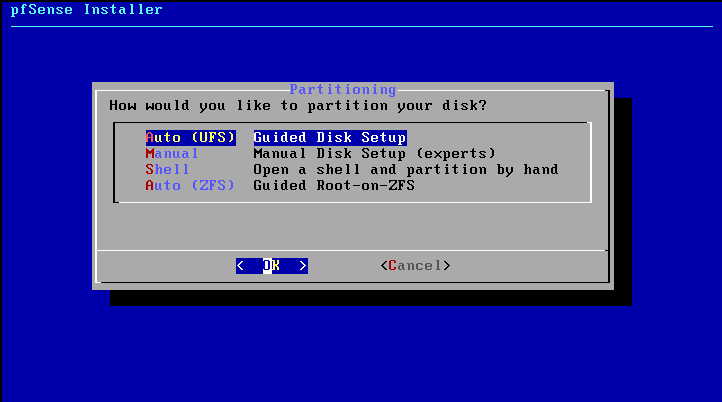
Now, you need to do the partitioning of the disk. Let’s keep it as Auto (UFS) and continue.
So, we are almost done here. It will take a few more minutes to complete the setup, obviously depends upon the system resources. Once, the installation process is completed, you will get the following screen.
Now, you need to reboot the firewall by selecting the reboot option.

After clicking on the reboot button, you will find that the pfSense firewall is getting a reboot, you will get the pfSense Logo, and finally a Welcome screen the same as per the given image.

So, in this step, we have successfully installed pfSense in VMWare. However, still you need to know a few more default configurations, so, let’s continue to the next steps.
Step 6: pfSense Firewall default configuration
As we have configured two interfaces, i.e. VMNET8 & VMNET1, so the first interface VMNET8 has DHCP enabled by default. So, our pfSense Firewall gets an IP from DHCP Pool.
If you want to access GUI/CLI from this IP address, you need to disable the packet filter. In this example, my VM gets IP address 192.168.83.129 from DHCP. So, to get CLI/GUI access, you need to enter in the shell by pressing key 8 and type the following command.
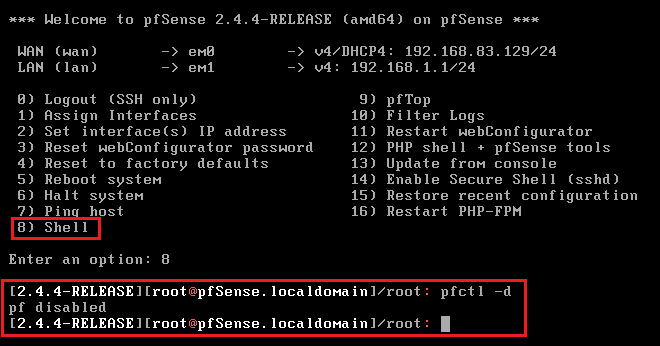
[terminal]pfctl -d[/terminal]
Now, you can access Firewall CLI/GUI using IP 192.168.83.129. You could also verify it in the below screenshot.
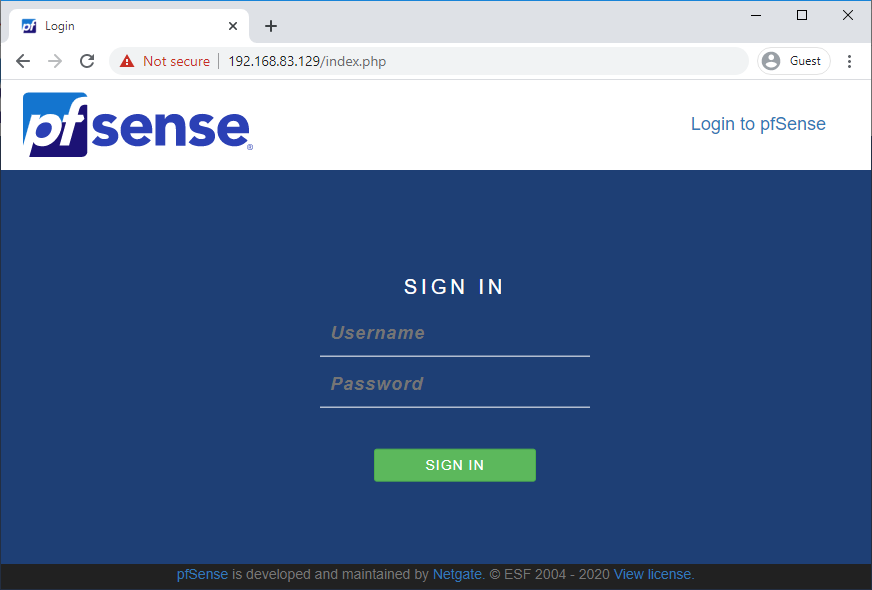
Note: The default Username is admin and Password is pfSense
Step 7: Getting the Internet allowed though the pfSense Firewall
Additionally, If you want to get Internet access through the pfSense firewall you can create another Operating System VM in VMWare. You need to get the ISO file like Windows 7 in my case. You need to install that OS in your VMWare Workstation. Now, you need to make sure that the second interface of the pfSense Firewall must be the same as the OPerating system interface. In my case, I’m using the VMNet interface on both pfSense and Windows7.
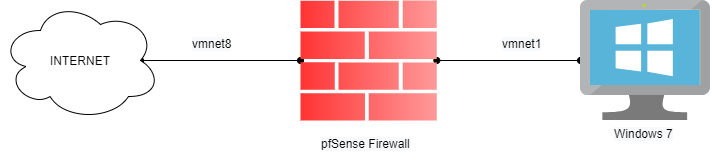
By default, DHCP is enabled on the LAN port of the pfSense firewall. So, you will get the IP from the 192.168.1.0/24 pool.
By default, the traffic will be allowed through the security rule. You can modify it according to your requirements.
Reference
Related Articles
- How to deploy the Palo Alto Firewall directly in GNS3
- How to deploy FortiGate Firewall in VMWare Workstation
- |How to Install Palo Alto VM Firewall in VMWare
- How to deploy FortiGate Virtual Firewall in GNS3
Summary
In this article, we download and install the pfSense firewall in VMWare Workstation. First, we downloaded the pfSense Installer ISO Image, latter we install it on the VMWare Workstation. We also perform some initial configurations on the pfSense firewall. The default username and password is admin, pfsense respectively.
Did you like this article? Please share this article on social platforms and support us, it’s free!
FYI FreeBSD is not linux. They are very different on a number of levels.
Thanks, Greg ;). I will edit the post accordingly.
Hi, Guide how to route all traffic to pfsense VM?
So others devices example: Wifi Mobile phones traffics all go through the VM Pysense before getting to the Mobile Phone.
How to ? please thanks