
In this article, we will configure the Global VPN Client (GVC) configuration on the SonicWall Next-Gen Firewall. SonicWall Firewall allows you to connect your internal resources using a Global VPN. The only requirement for a Global VPN is you must have reachability to the SonicWall Firewall. So, let’s start!
Scenario – Global VPN configuration on the SonicWall Firewall
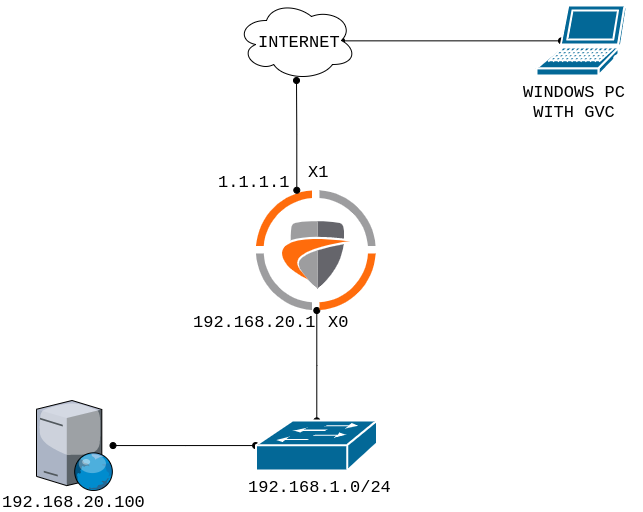
You just need to understand the following scenario, which is used in this article. IP address 1.1.1.1/30 is assigned on the SonicWall X1 interface. As pe our setup, the X1 is the WAN Interface. We will install the SonicWall Global VPN Client (GVC) on the Windows 7 system. Windows 7 PC has proper reachability to 1.1.1.1 i.e. SonicWall WAN Interface through the Internet. You can consider the following network topology:
How to configure a SonicWall Firewall for Global VPN Client (GVC)
The Global VPN Client (GVC) uses the IPSec tunnel with the SonicWall appliance. As we already discussed, you must have reachability to the SonicWall firewall to connect the Global VPN Client (GVC). In this article, we will use the SonicWall official Global VPN Client (GVC). The below steps will cover all basics to the advanced configuration of GVC on a SonicWall firewall.
Note: You must have proper Administrator Privileges to configure SonicWall Appliance!
Step 1: Download and Install the Global VPN Client (GVC) from MySonicWall Portal
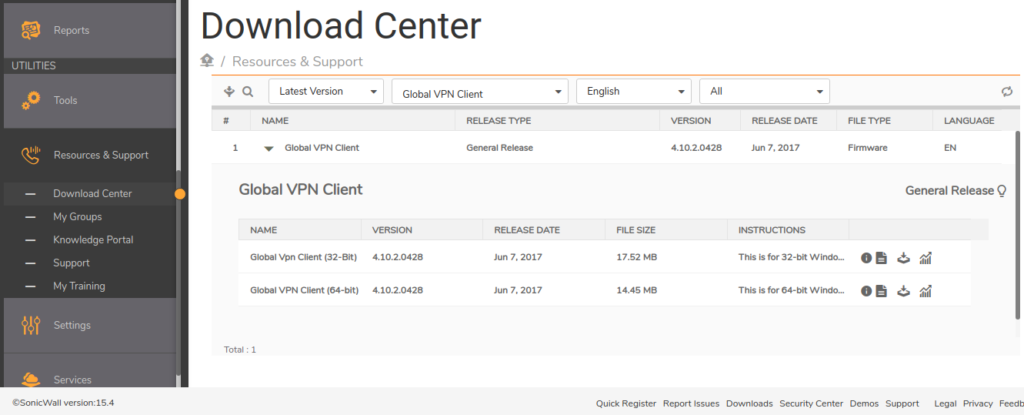
First, you need to download and install the SonicWall Global VPN Client (GVC) from your MySonicwall Portal. You can download it free from your MySonicWall Portal. Visit, MySonicWall Portal and navigate to Resources & Support >> Download Center >> Download Global VPN Client as per your system architecture. You just need to initiate the setup using Administrator Privilege and Install the Setup.
Step 2: Configuring the WAN GroupVPN for Global VPN Client
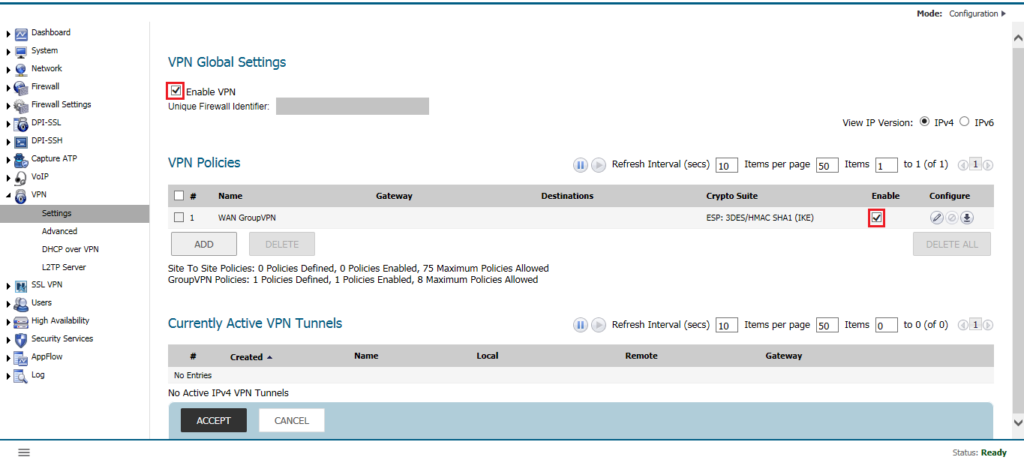
Now, we need to configure the SonicWall Firewall to accept the Global VPN Client requests. Login to the SonicWall Firewall and Navigate to VPN >> Settings. Make sure to enable the VPN Global Settings. Now, navigate to VPN Policies on the same page and make sure to enable the WAN GroupVPN.
Now, click on the Edit icon to configure the WAN GroupVPN. Here, you need to configure the different parameters to accept requests from SonicWall Global VPN Client.
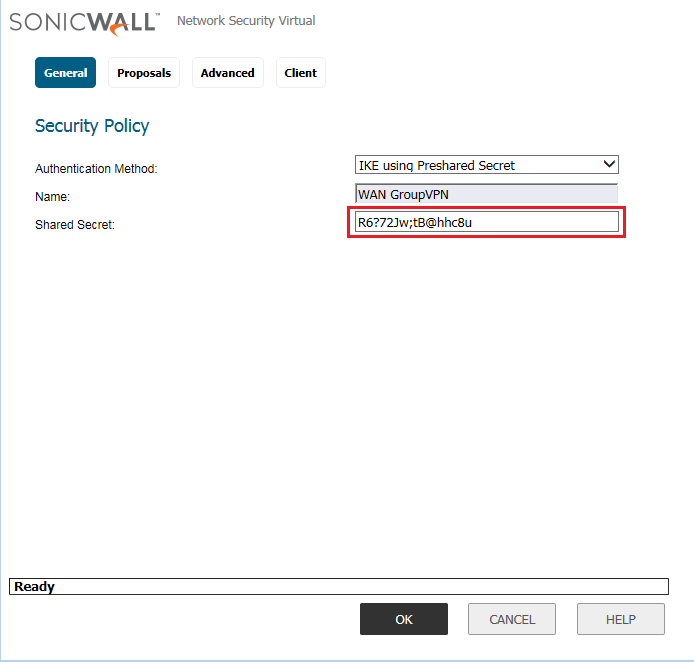
In the General Tab, you need to define the Authentication Method. Here, you can configure either the Pre-Shared key method or you can authenticate the client using Certificates. However, in most cases, we use the Pre-Shared Key.
Note: Pre-Shared key should be strong. It can contain number, alphanumeric and special characters!
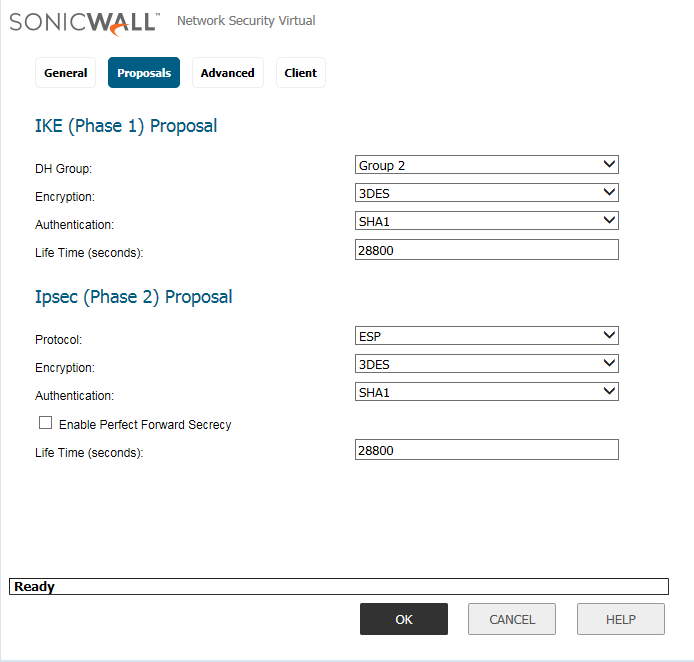
How, in the Proposal Tab, we need to define the Phase1 and Phase 2 Parameters like Encryption, Authentication and key lifetime. Encryption, Authentication parameters are used to encrypt the VPN as well as Network Traffic.
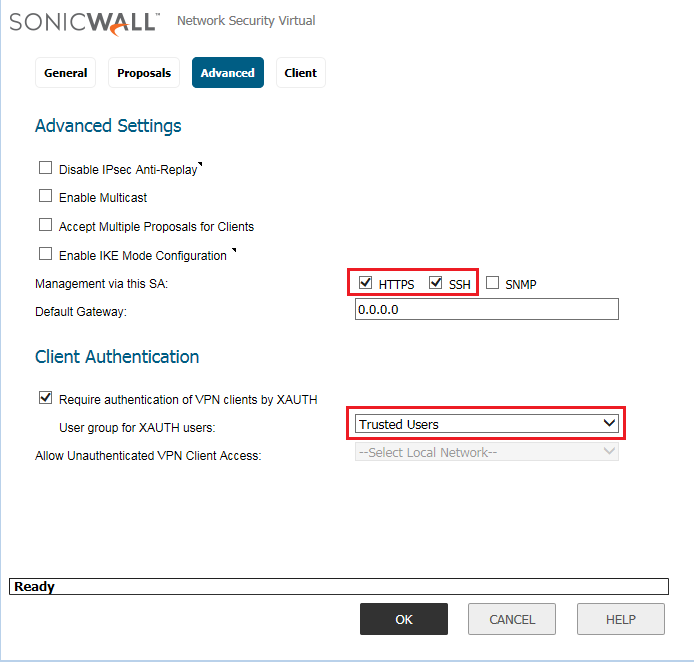
Now, in the Advanced Tab, you need to select the Authentication Group to Authenticate the requests from the Global VPN Client. By default, the Trusted Users Group is selected. However, you can configure different groups as well.
Also, if you need to manage the SonicWall appliance over the Global VPN Client, you need to select HTTPS/SSH depending on your requirements.
Here, I’m leaving the Client settings to default. However, we will discuss this in upcoming articles.
Step 3: Configuring Users for Global VPN Client in SonicWall Firewall
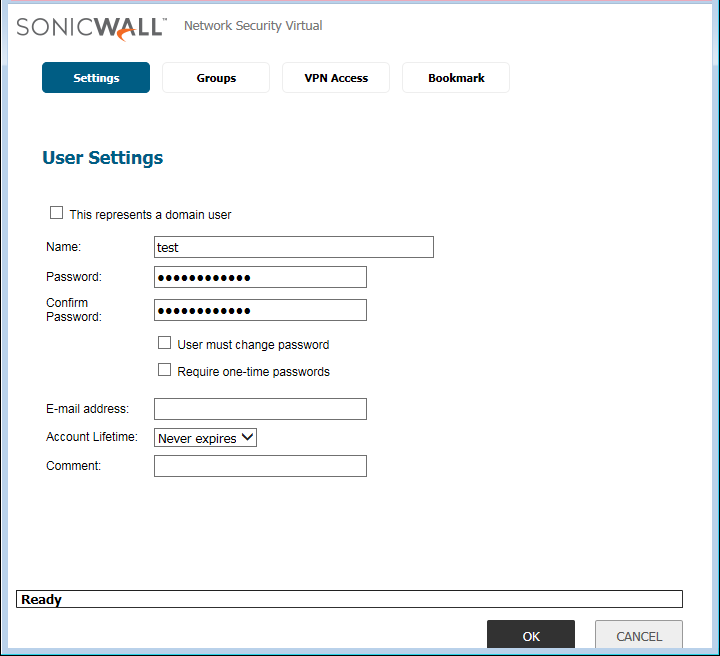
Now, we need to configure the Users for the Authentication. We will create local users for authentication on Global VPN Client. However, you can use LDAP, Radius for the user’s authentication. Navigate to Users >> Local Users & Group >> Local Users and click on Add. A new popup window will appear. Here, you need to define the Name and Password for the User.
Note: In this example, I’m using a user with Username test & Password Password@123.
Now, click on Groups. In step 2, Advanced Tab, we define the Authentication Group to Trusted Users. So, make sure that the user test is a member of the Trusted Users Group.

Now, click on the VPN Access Tab, and select the Networks you want to access using the Global VPN Client. However, you must configure the Access Rule to access the defined routes.

Leave the Bookmarks tab settings to default and press OK.
Step 4: Configuring the Access Rule for Global VPN Client
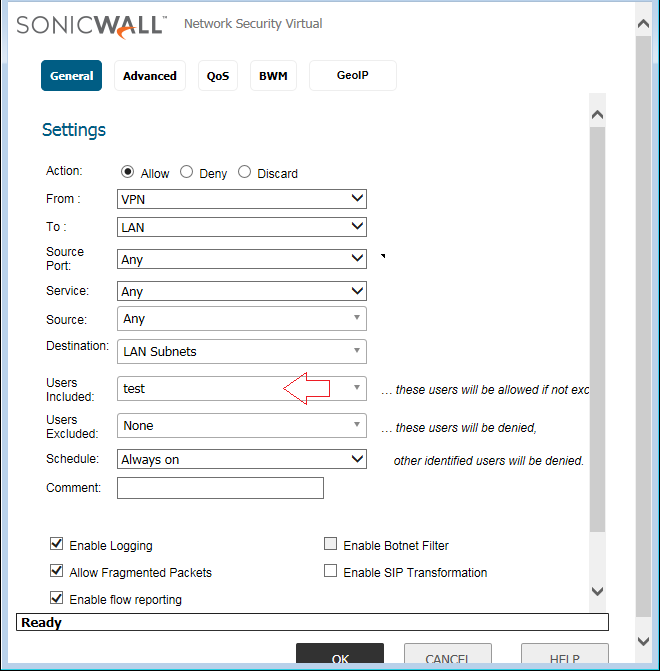
When we configure the WAN GroupVPN in step 2, the SonicWall Firewall automatically adds some rules from VPN to LAN Zone. However, it is always recommended to modify the automatically created rules. So, Navigate to Firewall >> Access Rules and click on Add. You can configure the Access Rule as per your requirement. For example, I want to LAN Subnet access from the SonicWall Global VPN Client to a specific user test. You can refer to the below screenshot for the configuration.
Note: Ignore if you get any warning message.
Step 5: Adding a New Connection Profile to SonicWall Global VPN Client
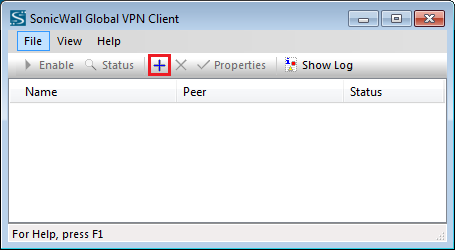
In step 1, we have successfully installed the SonicWall Global VPN Client on the test machine. Now, we need to add a new connection profile with respect to the SonicWall configuration. Click on the Add (+) button on the Global VPN Client.
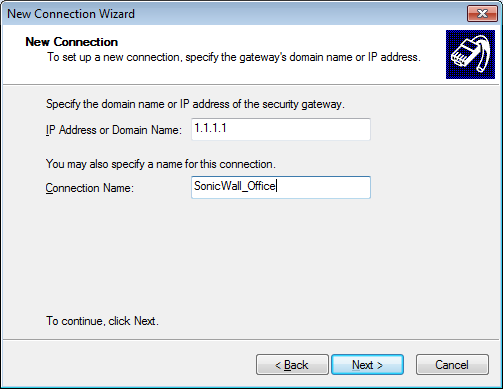
Now, a new pop-up window will appear. You need to select Next and define the Connection IP Address & Name as shown below.
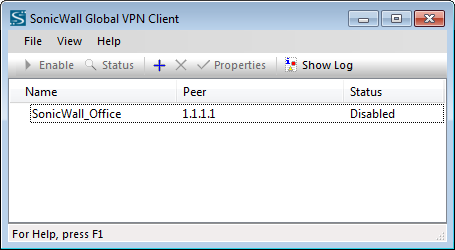
Now, click on Next and Finish the setup.
Step 6: Connecting to the SonicWall Next-Gen Global VPN Client
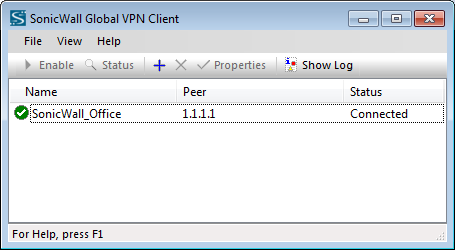
In the previous step, we have successfully configured New Connection Profile in Global VPN Client. Now, you need to Enable the configured Connection Profile. Just click on Enable Icon.
Once, you enable the Connection Profile, you need to provide the Pre-Shared Key, which we created in Step2 and click Ok.

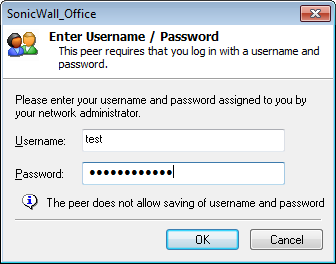
Now, you need to provide the username and password for authentication. As we already created the Local Users in Step 3, we need to define that credentials here.
Upon successfully authenticated, you can check that we are successfully connected to the SonicWall Global VPN Client.
Step 7: Verifying the Access to the internal resources
In step 6, we had successfully configured and connected to the SonicWall Global VPN Client. However, here we will check the connectivity to the internal resources using the ping utility. I have one live machine, in my LAN Zone. So, I’m imitating the ping from the VPN Client system.
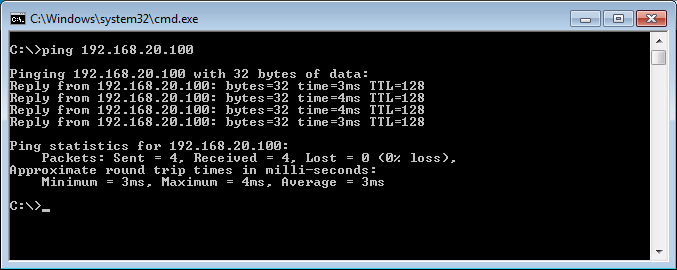
So, in this way, we have successfully verified the connectivity towards the LAN Resources.
References
Related Articles
- How to configure GlobalProtect VPN on Palo Alto Firewall
- How to deploy SonicWall Next-Gen Firewall in VMWare Workstation
Summary
In this article, we successfully configured the SonicWall Global VPN Client configuration on the SonicWall Next-Gen Firewall. We enable the default WAN GroupVPN Policy. We configured the Pre-Shared Key for the IPSec Phase 1. Then, we configured the Trusted Users Group for the Authentication. We also allowed the HTTPS/SSH Management over the Global VPN Client. In Access Rule, we configured the custom Access Rule for the Network Traffic. Last, we download and install the SonicWall Global VPN Client on the test PC. We are able to communicate with the LAN resources.
Did you like this article. Please comment in the comment box for any further information.
this is for only window based , if we are using MAC UBANTu , and phone. how to connect with it.